Multi-Sport

Triathlon Transition Excellence – Mastering the 4th Discipline

March 12th, 2024 by JoAnn Cranson

By:  Jay Campbell

Swim, Bike, Run …. Do well at all three and you will be a good triathlete.  But to be a great triathlete, you need to master what some call the ‘4th discipline’, the transition.

How important is the transition?  It becomes more important in shorter races. In a 600 minute race (10 hours) the difference between a 2 minute and a 4 minute transition is less than a 1% improvement…so not that important. But if you are doing supersprint races (~30 minutes), that would be a 13% improvement!

Just to prove that I know what I am talking about, here are the top-10 fastest T1 + T2 times at the 2023 Eagle Lake Triathlon, a ‘sprint’ distance race.

 Transitions

1-Jay

26

22

3

40

49

7

28

9

2

T1+T2

00:00:41

00:00:56

00:01:09

00:01:13

00:01:15

00:01:16

00:01:25

00:01:32

00:01:36

00:01:38

I spent a total of 41 seconds (21s in T1 and 20s in T2) in the transition area. Yes, it was a smaller, local race with a compact transition zone and limited competition…but those are factors which you must consider when developing your transition strategy.  Each race will be unique and requires a different strategy. I will walk through the strategy I used for this race and suggest alternatives for other scenarios.

From the table above you can see that the 2nd and 3rd place finishers had good transition times…they were both in the top 10.  But finisher #2 still gave up almost 1 minute to me on his transitions. Here are the times for S/B/R with the transition times removed:

OA Finish

2

1-Jay

3

4

8

5

6

7

10

11

S+B+R

00:56:28

00:56:58

00:57:35

01:00:20

01:01:55

01:01:58

01:02:19

01:03:04

01:03:18

01:04:03

In general, S+B+R times correlate with overall finishes. The main exception to that rule in this case was my superior transitions which led to yours-truly walking away with the Overall Winners Trophy and local bragging rights. Another exception was the 5th fastest S+B+R who had slow transitions did drop to 8th OA.

Before I dive into my secrets for a fast transition, let me say that if you are new to triathlon, ignore all of this. My caution to new athletes is not to ‘overthink’ the sport during your first year of racing. Just get out on the course, listen to your body, pace yourself, and be cautious during bike mounts and dismounts.  There will be plenty of time in the future to dive into all the tiny tweeks that add up to measurable gains.

Are you ready? It pains me a bit to give away my secrets.

A. DEVELOP A TRANSITION STRATEGY

1.  Understand the course. Every race has course maps.  Study them to get an idea of what you are up for in transition. In the case of Eagle Lake, I could see from the course map and verbal description that the Bike Corral was about 400 yards from the Swim. That 400 yards was on asphalt and mostly uphill. I would be definitely wearing running shoes from Swim to the Bike Corral. The swim was only 300 yards, so I toyed with the idea of no wetsuit as wetsuit-removal sucks up transition time.  But for me, as a mediocre swimmer, the speed advantage of a wetsuit trumps the removal time even for races this short. The bike course is only 11 miles so I opted for biking in my running shoes using pedal straps.  I would already be in my running shoes coming in from the swim, so that was another factor that supported the bike shoe decision.
2.  Practice your transition strategy.  It is common for me to use a slightly different transition strategy for every race…each race is unique. You don’t want race day to be the first time trying out a strategy, even if it is only slightly different from your ‘norm’.
3.  Be prepared to change transition strategy on race-day.  Bring multiple shoes, pedals, and swim gear. Inspect the transition area. Walk/Run/Bike the transition approaches. If the water temperature disallows wetsuits, how will that change your transition?

B. TRANSITION SKILLS (I will focus on strategies for short races as this is where transition times are more critical)

1. Wetsuit removal – Removal of the wetsuit is usually the first skill used in transition. There are some great youtube videos on this, but here is what works for me:
a) before you put on wetsuit, spray lower legs with copious amounts of triglide or other lubricant.  These will help the suit slide off.
b) wetsuits become harder to take off once the small amount of water between suit and legs is drained.  So better to take off before a  long run to a distant bike corral.
c) Flip up your goggles and start pulling down your top as you exit the water.
d) Once you get your suit down to your hips, stop running and push the suit to the ground and start trying to step out of it.  I am so impressed with the videos of pros and others that can do this standing up.  I can’t do it. What works for me is to find a pole I can hold onto as I try to step out of the wetsuit. When it is at my ankles, I drop to the ground and use the index and middle finger of  my dominant hand to slide down my Achilles until my knuckles are under my heels and push the suit off that foot.  Repeat on the other leg.
e) In the case of Eagle Lake, I stopped at a speed limit sign about 25 yards from the Lake.  I could hold onto the sign to remove my wetsuit.  My running shoes had been placed there earlier.
2) Donning socks – Putting socks on wet feet can be difficult.  I have found that:
 a) putting on the sock before the race in the transition area and then
 b) rolling it down all the way to the toes, prepares the sock for easier application.  Socks   were not part of my Eagle Lake strategy.
3) Donning Running Shoes – Once again, I am impressed with the pros (and probably many of you) who can put on shoes without sitting down. The shoes I used at Eagle Lake had been fitted with elastic laces.. in fact I just used some elastic strap from my sewing box.
a) grasp the tongue with one hand and the heel counter with the other. I find that if I line up my big toe with the tongue and my little toe with the heel counter, shoes go on easier.
4) Running on long transitions – Long distances between swim and bike corral are not unusual.  The Grand Rapids Tri has what seems like a half-mile run from River to the bike corral.  When the run has been on grass or carpet, I have not used shoes. I have both run in my wetsuit and carried my wetsuit…I think I run faster with my hands free (not carrying a wetsuit), but then the wetsuit becomes harder to get off. At Eagle Lake I opted to get the wetsuit off quick, don shoes, and run like crazy up the hill to the bike corral. The swim-split at Eagle Lake included the run from Lake to Bike. I had the seventh fastest split and I am fairly convinced my placing would have been worse without my transition strategy.  Note that swim-split is not a good predictor of Overall Finish…a plus for us mediocre swimmers.

49

7

19

4

28

18

1-Jay

21

2

20

OA Swim

00:06:31

00:06:38

00:06:51

00:07:06

00:07:12

00:07:24

00:07:39

00:07:41

00:07:46

00:07:50

5) Donning Bike Shoes – After removing wetsuit/goggles/cap, the first thing I do is put on my biking shoes. As mentioned, I finish wetsuit removal on my butt and I put on bike shoes on my butt. [not the strategy at Eagle Lake].  Of course the pros and many of you already have shoes attached to pedals, so this does not apply to you.  There is some time savings to using the shoes-on-pedals method (the 2nd and 3rd finishers at Eagle Lake used that method.) But, bike-mount and dismount are where 90% of the crashes occur in triathlon. I am too old and fragile to risk that any more. There are some good youtube videos on the shoes-on-pedals technique.

6) Donning Bike Helmet – putting on your bike helmet needs to be practiced. Place it in transition so it is one clean move from hands to head. Sliding the hands down to clip the strap.
7) Donning Biking glasses – This is an extra move but only takes a few seconds.  A visor on your helmet eliminates this step.
8) Running with bike – Practice running with your bike while holding with one hand on the seat.  If you are a shoes-on-pedals person, practice barefoot with the shoes attached.  If you are going to wear bike shoes, practice running in the bike shoes.
9) Bike Mounting – Technically the mount happens after the transition is exited. If done sloppily it only counts against your bike time and not transition time. The object is to quickly get to speed … without crashing. Whatever your method, practice it looking forward and not at your feet. My Eagle Lake strategy was to use a ‘hop-on mount’, pedal the first quarter mile on top of the straps (it was a downhill and I wanted no distractions), then get my feet in the straps.  I had practiced this enough that I could get into the straps without looking down or using my hands. If you are using the ‘shoe-on-pedal’ method there is usually a hand adjustment once you are in the shoe.  Make sure you can do this without looking. If you are using the worn-shoe method, you may want to be sure that one shoe is clipped in before hopping on.
10) Bike Dismounting – As with the mount, this technically happens outside of transition. If done sloppily it only counts against your bike time and not transition time. In the case of Eagle Lake, I removed my feet from the straps so my running shoes were untethered on the pedals. At about 5mph I swung my right leg over and did a running dismount. I had practiced this enough I felt very comfortable doing this. Dismounting with bike-shoes flopping from the pedals is too risky for me as I mentioned earlier. If I am wearing bike shoes, I unclip my left shoe, come to a complete stop, balance on my left leg, unclip the right shoe, push the bike forward and start running behind it. The pros make it looks so easy…except when…See some of the pros struggle here:  https://www.youtube.com/watch?v=140YBZF1miw&t=353s<
11) Bike racking – Generally bikes are racked on the saddle noses. The bike is usually ‘backed in’, raised, then moved forward to position the nose over the bar. That’s a lot of motions. Practice racking your bike from the ‘wrong side’ before the race starts. It may not be possible as other bikes are in the way. But when you get back from biking and the transition area has fewer bikes, you may be able to run your bike right into its spot from the rear, ditch your helmet and go.

12) Helmet Removal – This may not sound like a skill, but after a duathlon at 40F with gloves on it is a whole different ballgame. My hands have gotten so cold that I lost grip strength and could not undo a chin strap clasp. I have practiced this so many times with gloves and with different parts of the hand. Reduce the movements you need to make this happen.  Place the helmet where it will not get damaged by other triathletes.

There are thousands of small innovations and skills in triathlon that when summed up can amount to measurable gains.  It’s one of the things that has kept me in the sport.  Keep an open mind when planning your next transition and maybe it will kick you up a place or two!


New to Triathlon? Learn from 3 Athletic Mentors Team members!

February 1st, 2024 by JoAnn Cranson

By:  Natalie Rowe

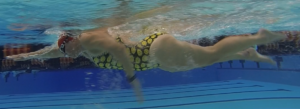
A few weeks ago, Athletic Mentors hosted their Swim Stroke Video Analysis. There were 12 of us that participated, many of us fairly experienced swimmers…but after watching the videos, we all had technique issues, mostly hand entry and catch issues. Just to give you an idea, I grabbed an image from one of my videos to show you what we saw under the water.

When we met and reviewed our videos as a group, we started talking about the upcoming racing season, training and triathlon in general. It got me thinking…we were all beginners at some point and pretty clueless about all things triathlon. I thought it would be fun if a few experienced triathletes answered some of the top Googled questions about triathlon. I went to Google, looked over the questions and selected 5 questions that I thought would be helpful, and truthfully I’ve also been asked during training!

For those totally new to triathlon or multi-sport, I want to give you a foundation to start with. Typically, it’s three sports; swim, bike, and run performed consecutively in that order. There are other events in the family too; like duathlon, aquathon and aquabike (and other variations which we won’t get into). Now that we’ve clarified what a triathlon is, there are different triathlon distances, but the shortest standardized distance is a sprint triathlon and the longest is the iron distance. There are shorter and longer distances, but they’re not standardized. Here is a chart of what the distances look like:

Name of Event Swim Distance Bike Distance Run Distance
Sprint 750m* 20K / 12.4 miles 5K / 3.1 miles
Olympic 1500m* 40K / 24.8 miles 10K / 6.2 miles
Half Iron / 70.3 1.2 miles 56 miles 13.1 miles
Iron / 140.6 2.4 miles 112 miles 26.2 miles

Jay

Jay –  What makes it “standardized’?  If USAT (USA Triathlon) hosts a National Championship at that distance, does that make it “standard”?  For example, USAT hosts a National Championship at the Super Sprint distance each year at the Multisport Festival.  There is also a Super Sprint World Championship race.

Natalie – after Jay asked this question, I went back and did more research! Low and behold, there are different standards for different organizations. Since we’re US based, it seems appropriate to use what USAT deems standard. As it turns out USAT does include Super Sprint in their standard distances, they also include the World Triathlon Long Course. Here’s the fully updated chart:

Name of Event Swim Distance Bike Distance Run Distance Total Distance
Super Sprint 400m 10K / 6.2 miles 2.5K 12.9K
Sprint 750m 20K/ 12.4 miles 5K / 3.1 miles 25.75K
Olympic 1500m 40K / 24.8 miles 10K / 6.2 miles 51.5K
World Triathlon Long Course 2,000m 80K / 49.6 miles 20K / 12.4 miles 102K
Half Iron / 70.3 1.2 miles 56 miles 13.1 miles 70.3 miles
Full Iron / 140.6 2.4 miles 112 miles 26.6 miles 140.6 miles

Before we get to the questions, I asked everyone to share how long they’ve been participating in triathlon and if there is anything else about each of us that will give you insight into who we are or our background. 

Natalie: I’m the rookie of the group. I played water polo in high school and college. After many years of not being active, I started running mostly to lose weight and get in shape – it worked, but I became incredibly bored with just running, so I started migrating over to multisport and have been at it for about 5 years.

Dawn

Dawn: Swimmer for the fun of it before I could walk. Always a learner, I study triathlon and techniques to be the best athlete I can be. That education and desire to share it with others led me to become a USAT Certified Triathlon Coach.

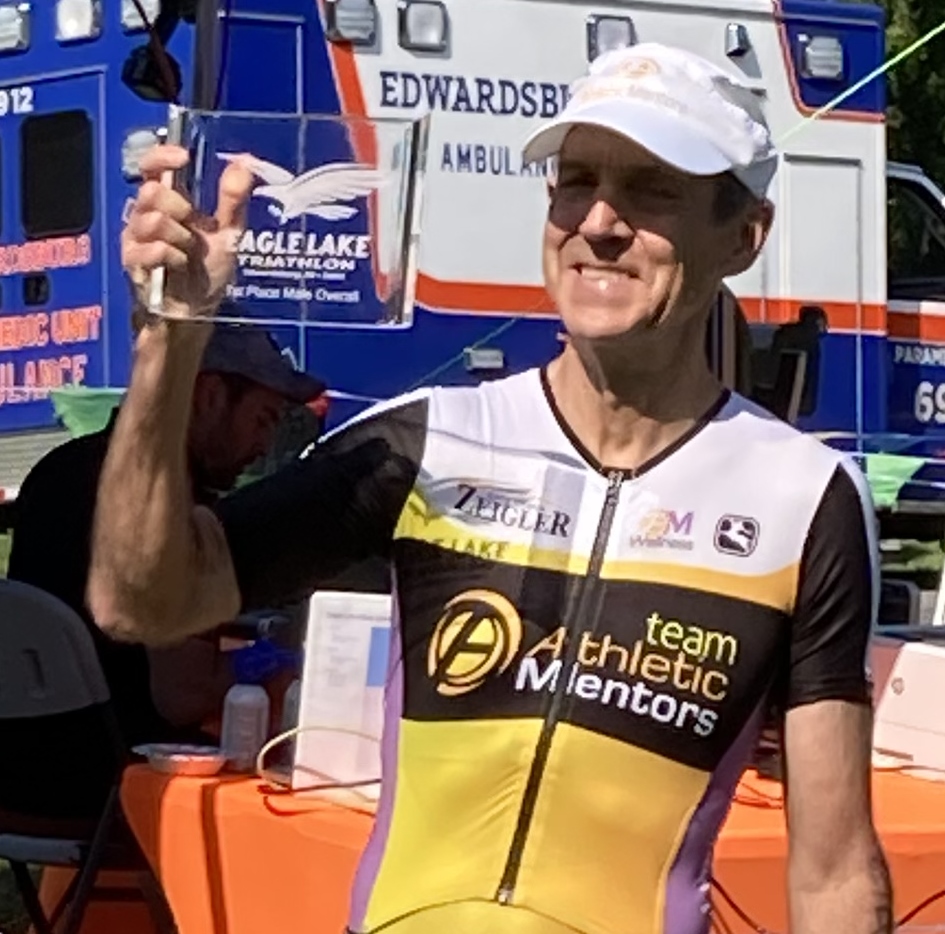
Jay: My first triathlon was as a team member (running leg) in the 1993 Gull Lake Triathlon. I started running in college… mostly to deal with stress. My first race ever was a marathon in 1978. I drifted to triathlon because I needed a new challenge.

Kathy: As strictly a runner, I discovered Triathlon after suffering some sport related injury due to the constant pounding of running.  I loved the variety the training provided and the adventure of the races.  I decided to “Tri” my first triathlon in 2007 and started sharing my passion for the sport as a USAT Certified Triathlon Coach in 2020.

1)      Do you do all 3 disciplines every day?

Natalie: No one has time for that! When I train; most of my training days I’m doing 2 workouts, occasionally back to back but the only time I’m doing all 3 disciplines is if I’m doing a mock race or actually racing.

Dawn: No. Most individuals do not have time for that and then you wouldn’t be able to focus and improve on your weakness. I do have my athletes practice bricks, two workouts done consecutively with the purpose of improving race pacing. The most typical brick is a bike followed by a run. I also have them practice very short triathlons during race season to practice their transitions, that is, changing from one sport to the next.

Jay: I generally shoot for 10 workouts per week. My magic formula was always 4-3-2-1   ..meaning 4 bikes, 3 runs, 2 swims, 1 strength. I won’t disclose my current formula 😉

Kathy

Kathy: I tackle the disciplines in 2’s (as a minimum): 2 bikes, 2 runs, 2 swims, 2 strengths.  While this does mean doing more than 1 workout in a day, it is usually broken up into 1 before work and 1 during lunch or after work.  With working full-time and having a family, that schedule may not always be achievable.  If I have to pick and choose workouts during the off season, I focus on strength training and the weakest of my 3 disciplines.

2)      So, you swim, bike and run all in the same day…do you get any breaks?

Natalie: There is a transition between each discipline, depending on the distance it could be as quick as putting on shoes (or switching shoes) or as long as doing an almost complete wardrobe change – which for an Iron distance, I did actually change everything I was wearing except for my sports bra. Even with a full wardrobe change, that was only about 7 minutes. 

Dawn: I wouldn’t call transition a break. As you are just starting out in triathlon use the transition time to prepare yourself mentally and physically for the next sport. Speed will come in time.

Jay: Triathlon is an endurance sport.  There is no sense in sprinting or in taking-a-break. Pace pace pace.

Kathy: There are no “breaks” during a triathlon and only a “transition” from one discipline to the next.  This transition is included in your total race time, so it is often called the 4th discipline in triathlon.  As you become more experienced in triathlon and want to look at improving your race times, improving your transition is the easiest way to save valuable minutes.  We also refer to it as “free speed”.  Practice, practice, practice.

3)      Do you run in bike shorts (the ones with all of the padding)?

Natalie

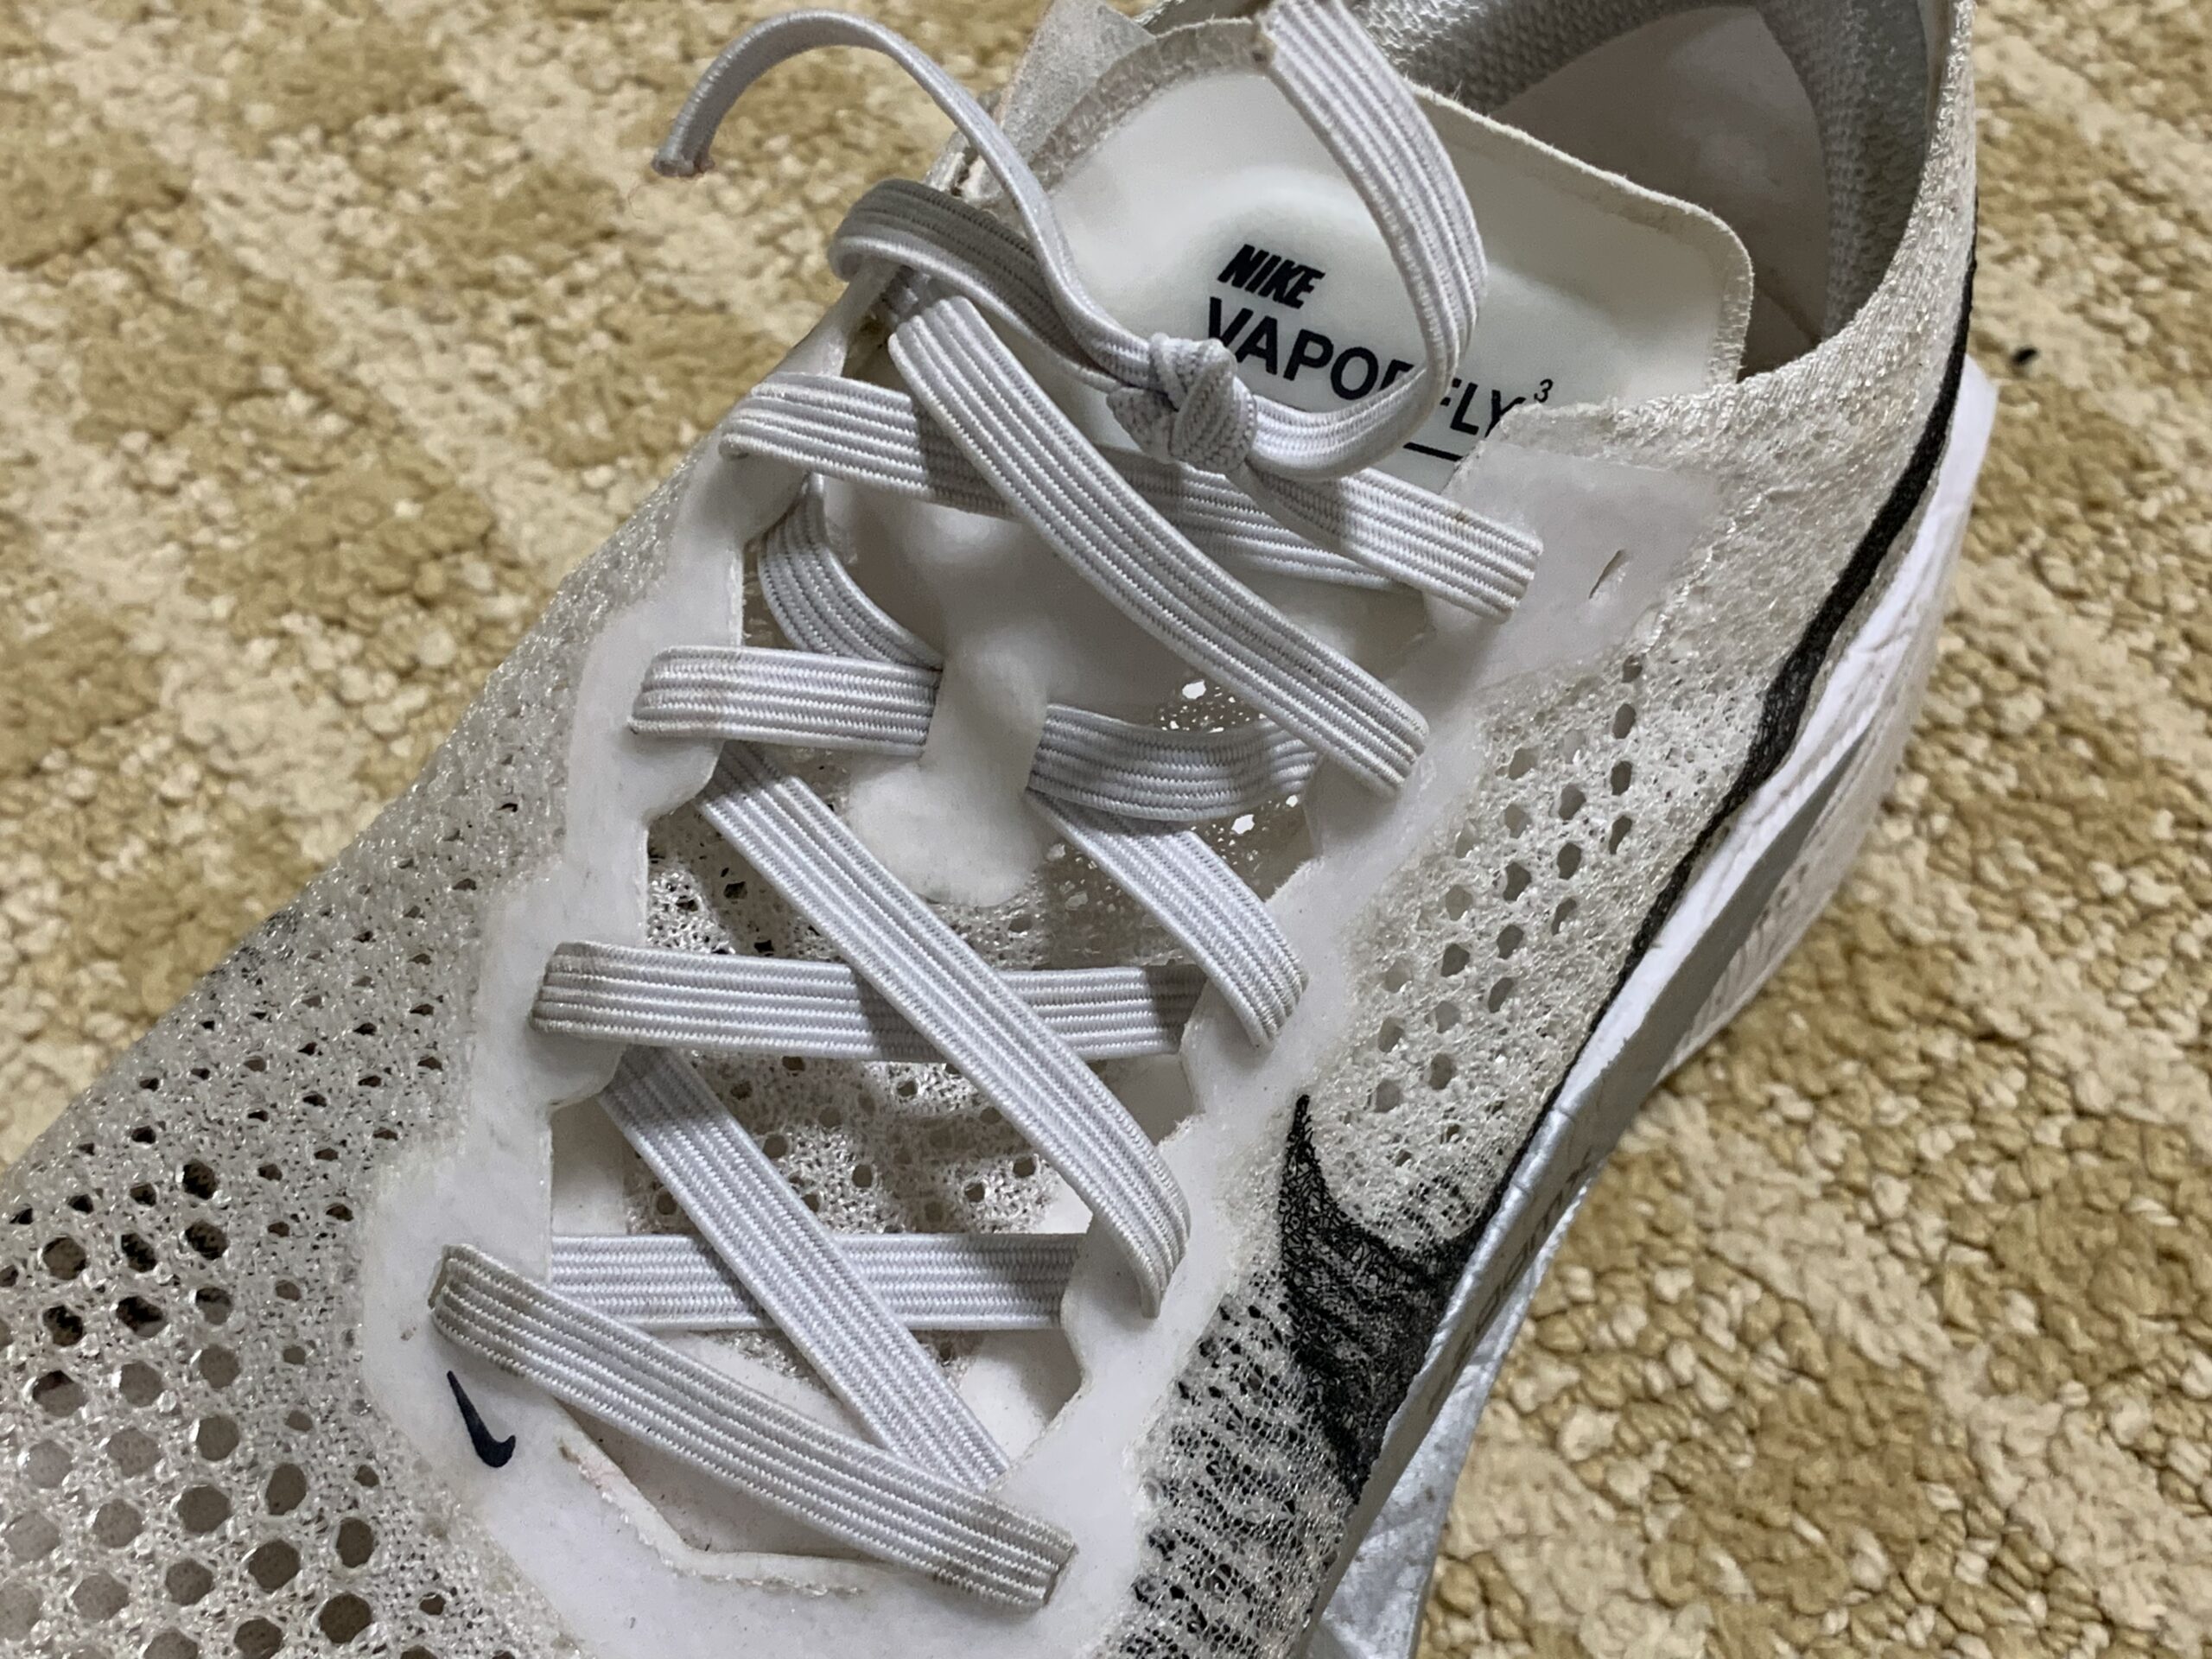
Natalie: I have done it, but for me personally, I don’t recommend it. On race day, I typically wear a tri short that has a chamois, but is much smaller than a traditional bike short. It does take time to get comfortable with something smaller. The one additional thing I would say about apparel, I didn’t really know what to buy when I first started, I bought inexpensive shorts and gear, but I quickly learned that you get what you pay for. The more expensive gear is typically a higher quality and has been significantly more comfortable. 

Dawn: I’m one of the few people who doesn’t mind cycling shorts while running. Mostly because the run off the bike in a training session will be rather short. I wear a Triathlon Kit with thinner padding for races.

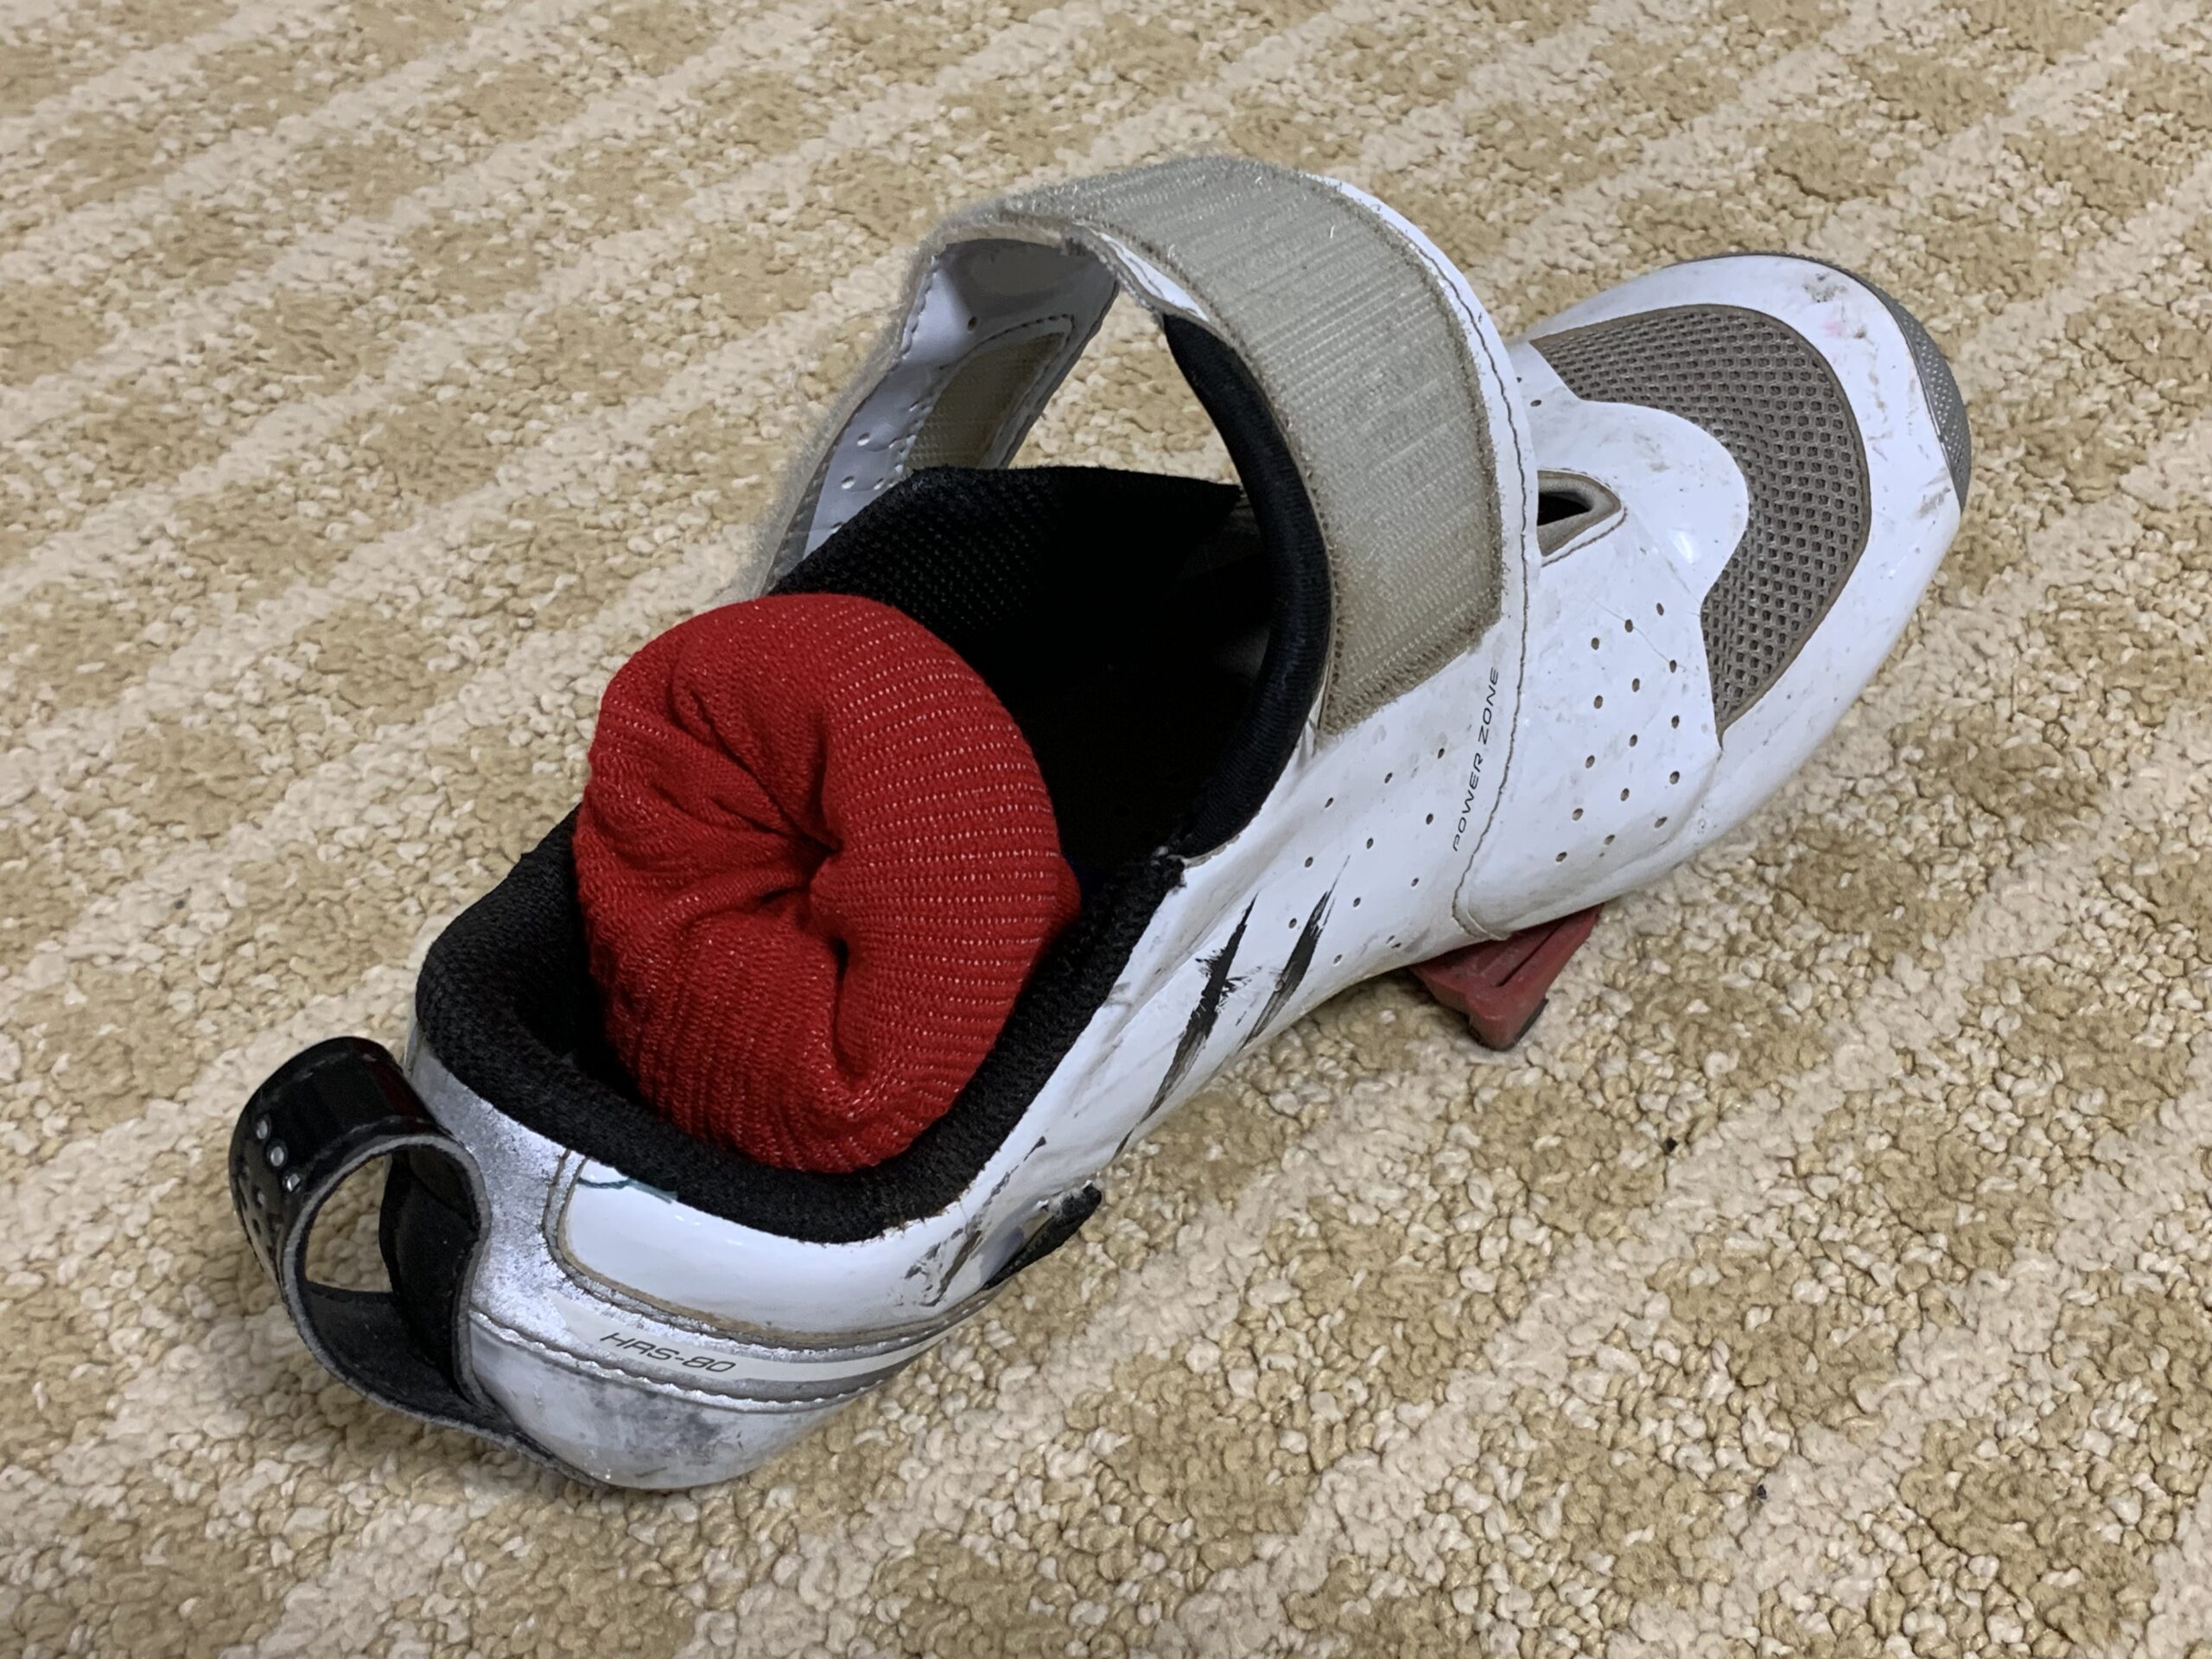
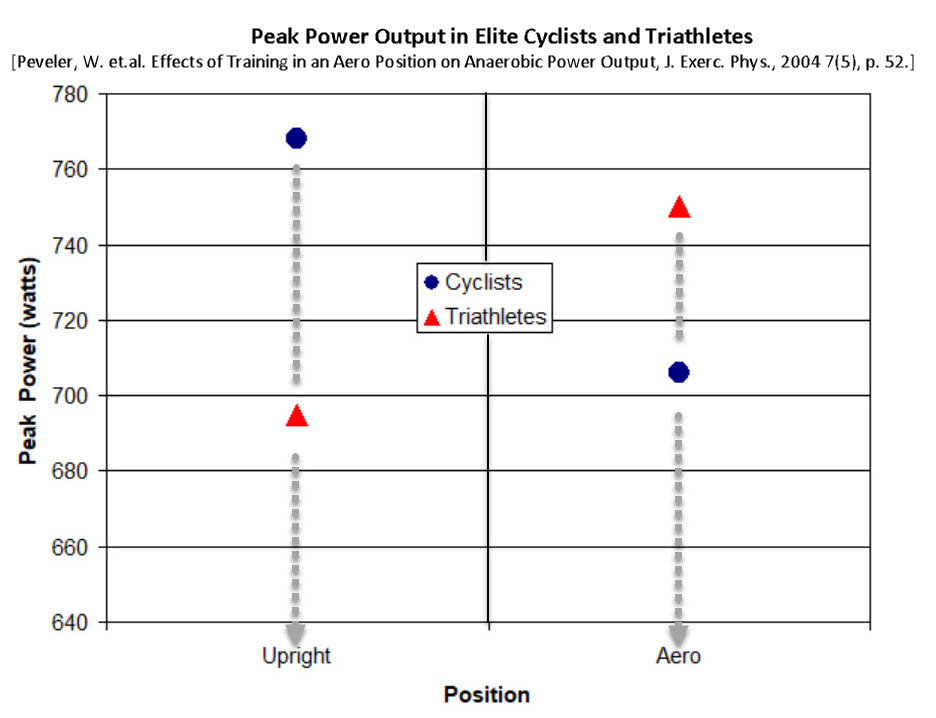
Jay: I come from the generation that wore Speedos on the bike. Wear what you feel comfortable in.  You will find that as you spend more time in the aero position on the bike, that you need less padding. To answer your question…never.

Kathy: I would compare running in bike shorts to running in a soggy diaper.  For a brick workout (bike followed by a run), if I wear cycling shorts on the bike, I will change into run shorts as I transition to the run.  During race day, changing isn’t an option, so I use triathlon shorts that have a much smaller chamois that dries quickly.

4)      How do you go to the bathroom?

Natalie: Personally, if I have to go – I’m going to stop and use a port-o-john. I’m never going to be so fast that I can’t stop to go to the bathroom. And if I have to go that bad, if I tried to push to finish, I would be miserable…not worth it!

Dawn: I agree with Natalie here. 

Jay: I’m not much help. My longest distances are marathons and half-ironman. In the hundreds of race I have done, I have never used the bathroom during the actual race….its a gift.  I must admit that lined up in my wetsuit prior to the start, I have watered the grass.

Kathy: I have learned over the years to use the bathroom whenever and wherever possible.  That may be the port-a-john, the lake, or even (full disclosure) sitting on the ground in transition.

5)      What advice would you give someone who is curious about trying a triathlon? (Ha, see what I did there.)

Natalie: Hire a coach. When I first started, I just followed a generic plan, which got me from start to finish, however I didn’t have anyone to lean on for questions or anything for that matter. For the Unique 10 stage adventure triathlon (in Michigan) I used a remote coach but realized pretty quickly how much I preferred having a local coach to help guide me. There are options for all budget levels, but this was a game changer for me. 

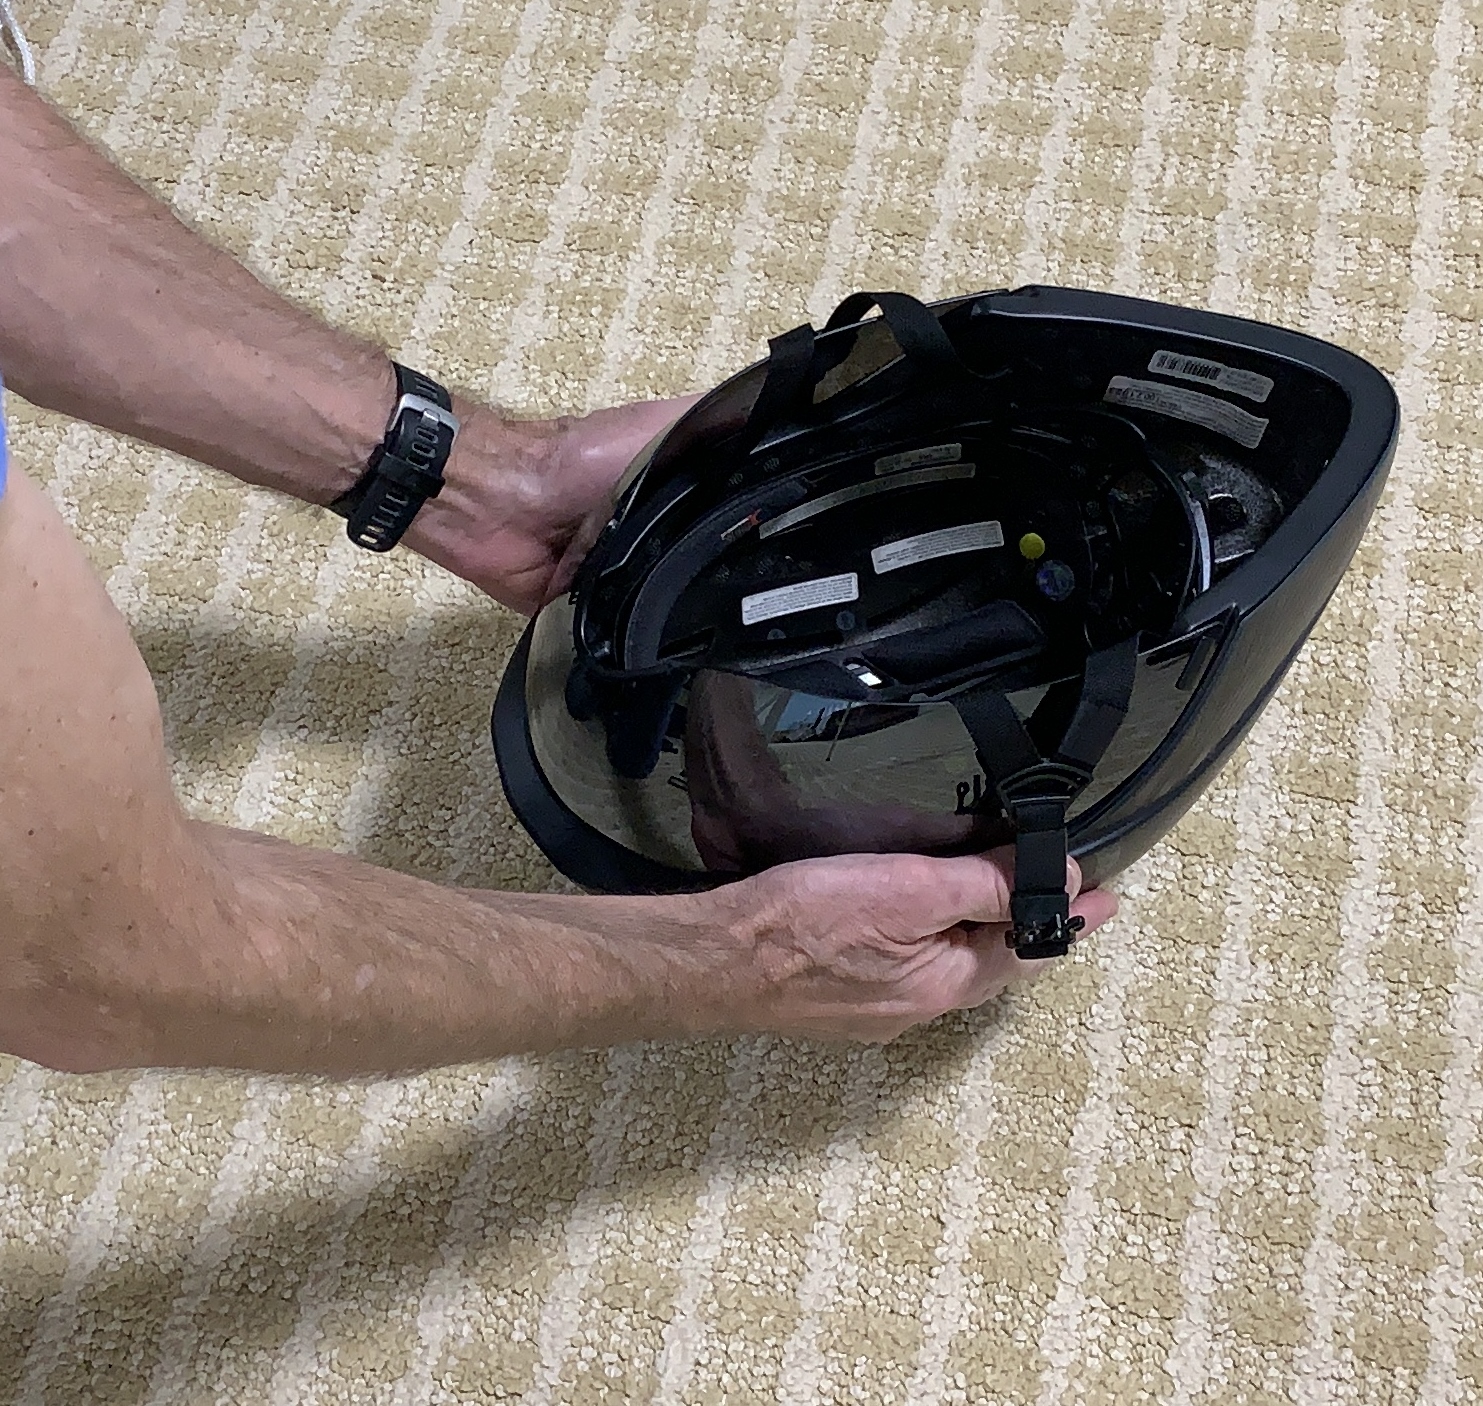
Dawn: Practice. Whether you read a book about triathlon, have a friend who can share their knowledge with you or hire a Coach, seek out knowledge to plan how you will get ready for your first triathlon. Before your race, lay out everything you will need for the race from start to finish. Then mentally and physically go through the steps, this includes getting wet and practicing how you will remove your cap, goggles etc before putting on your helmet and shoes to get on your bike. Remember, your first race should be enjoyable. If you are worried about being fast that will come later.

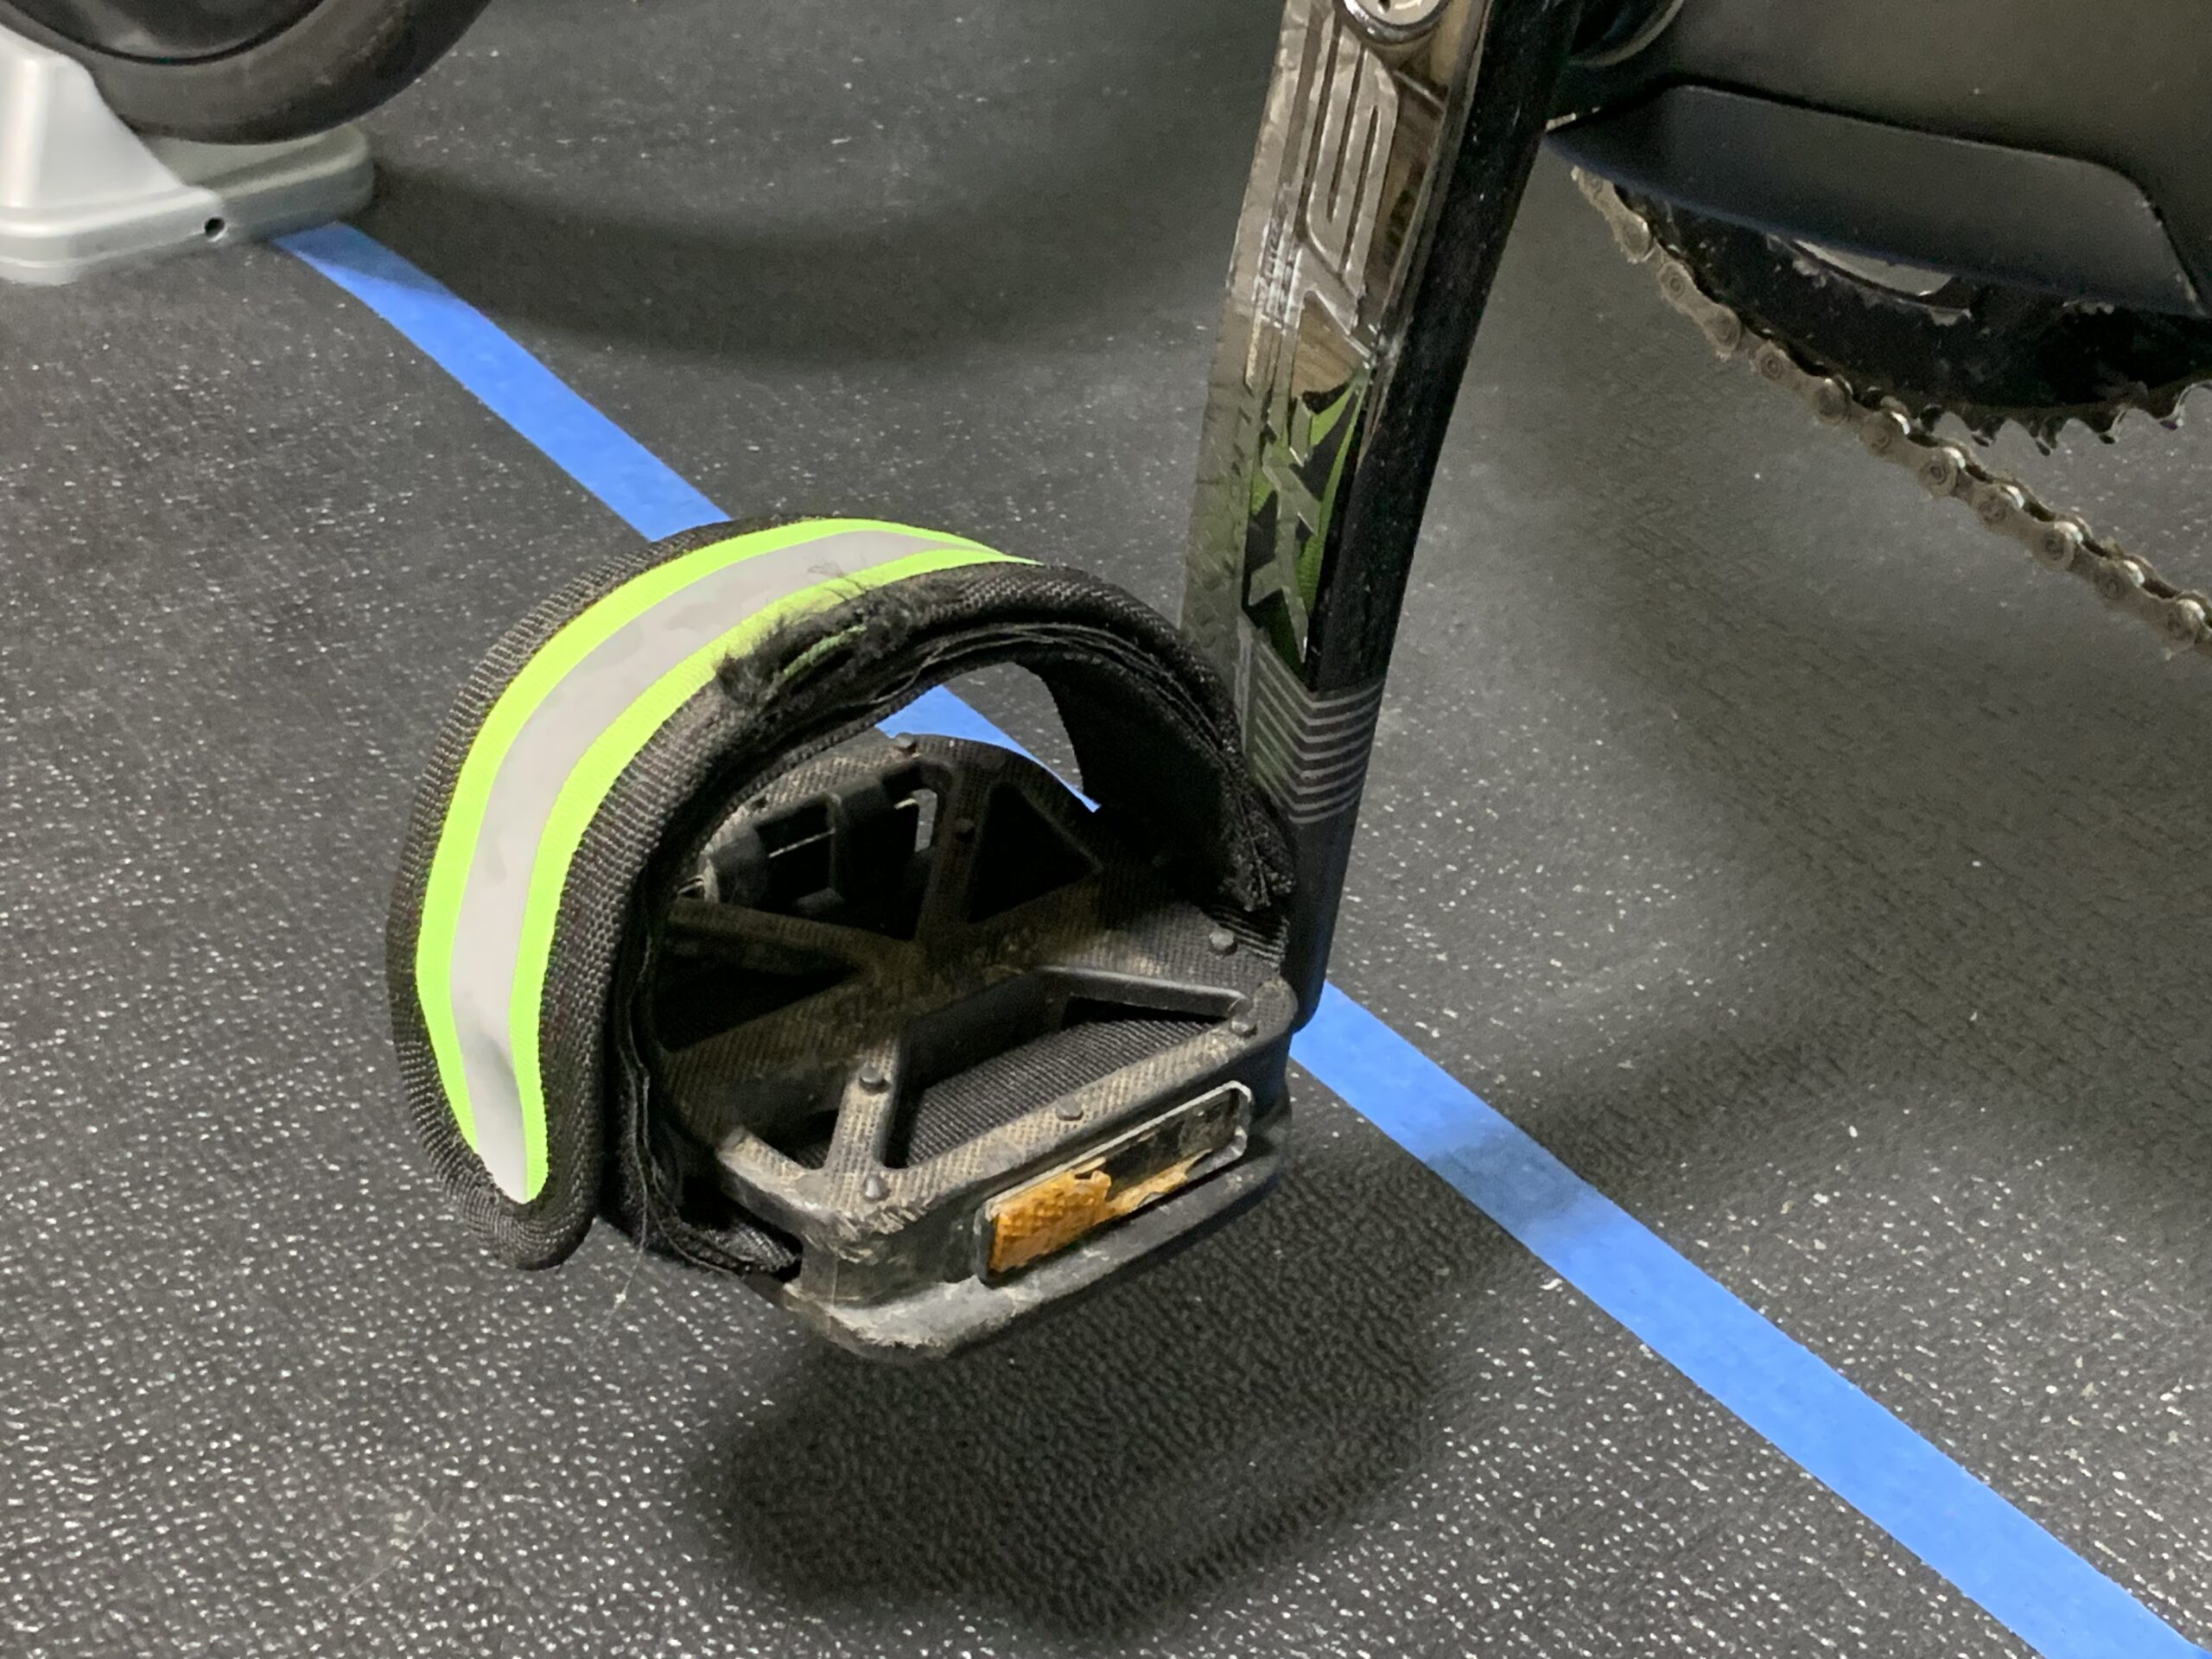
Jay: Don’t overthink it.  A lot of technology has made triathlon more complex than when we just put on our swimsuits and dragged out the Schwinn.  But there is nothing wrong with old-style. Don’t get intimidated by the gear of others. 

Kathy: Volunteer at a triathlon.  Volunteering gives you an inside view of the in’s and out’s of a triathlon.  It will help you to gain valuable experience while also helping to support the event.

This ended up being a really fun way for me to learn about the sport, find some really unique multi-sport events and how other athletes think about triathlon. Here are a couple of things I thought could be helpful, plus an event that might be added to my bucket list!

Learn more about USA Triathlon and all things Multisport

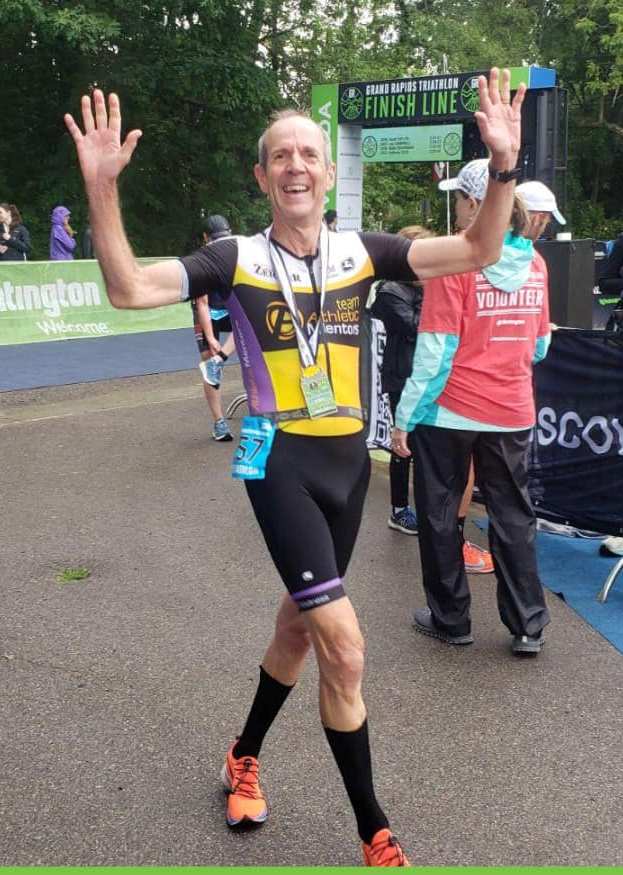
Grand Rapids Triathlon is one of my favorite independent races in Michigan. They offer Super Sprint, Sprint, Olympic and Half Distance at their 2-day event. It’s a great beginner event! 

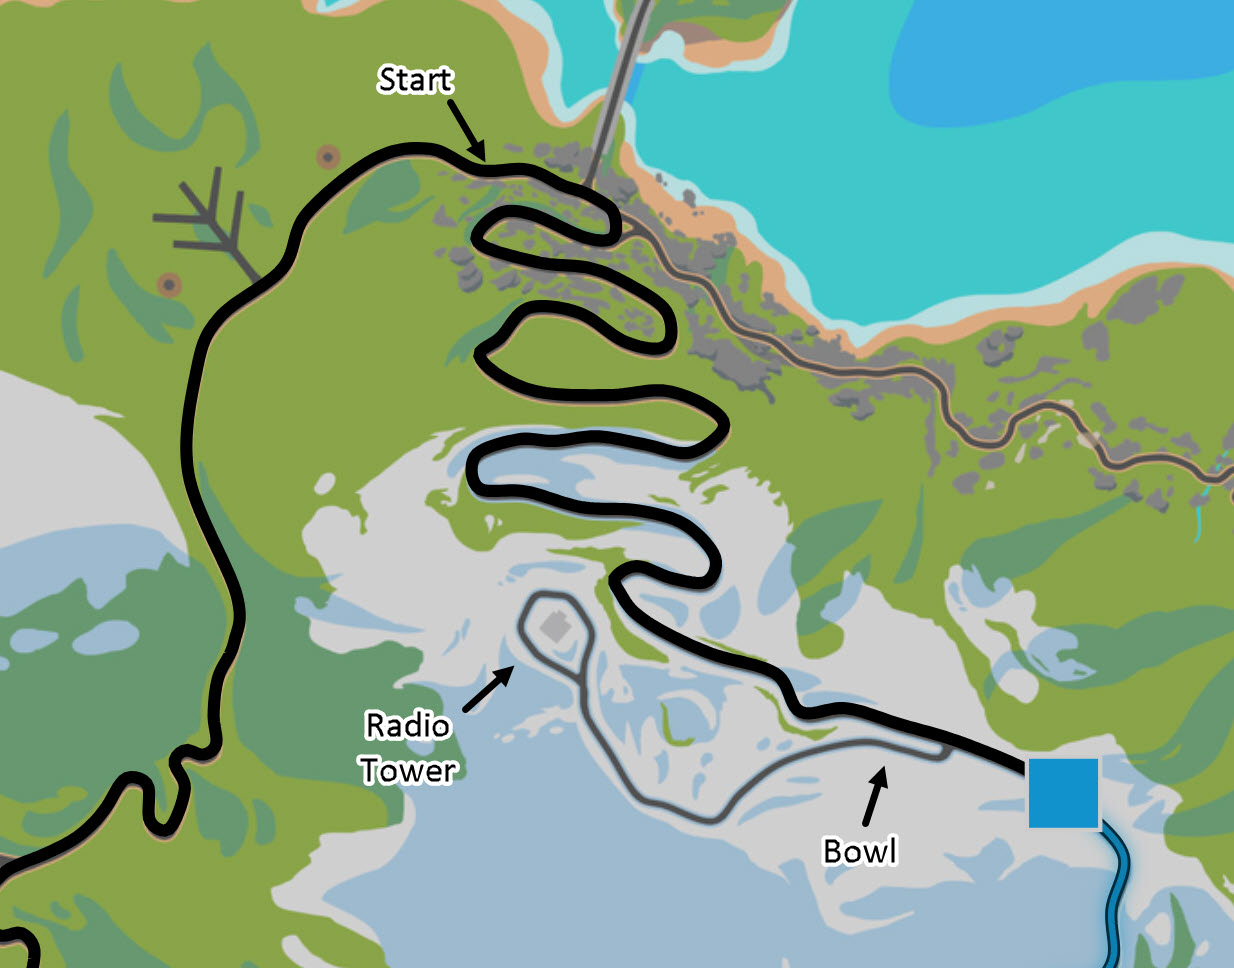
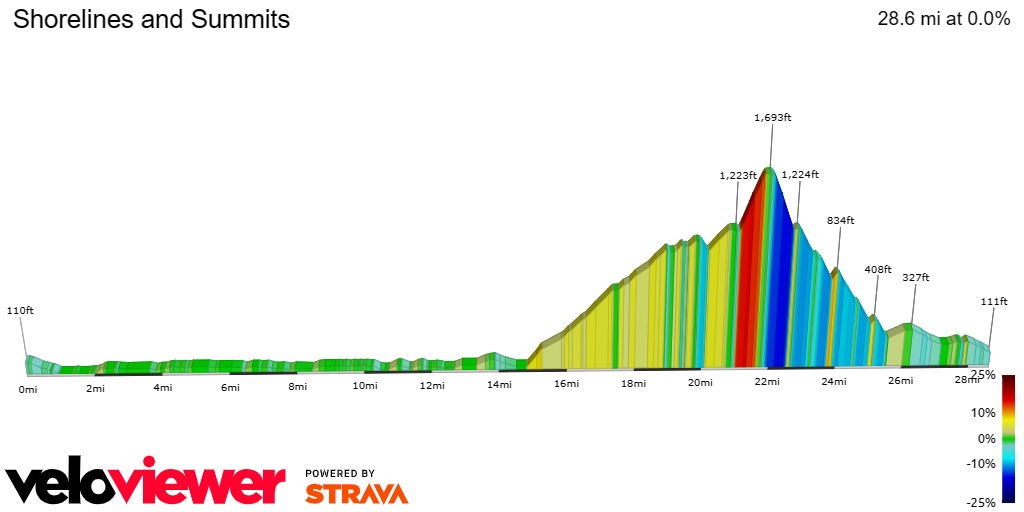
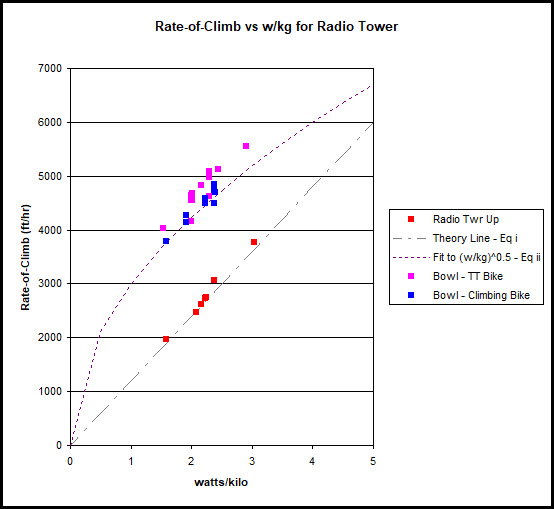
Unique 10 stage adventure triathlon (in Michigan) is the Battle of Waterloo 


The Zwift Tron Bike: HACKS TO UNLOCK QUICKER!

January 18th, 2024 by JoAnn Cranson

By:  Jay Campbell

If you are a Zwifter, you may have experienced a bit of bike-envy when a glowing-neon-bike came in and out of your view. [A “Zwifter” is a user of Zwift, “… a massively multiplayer online cycling and running physical training program that enables users to interact, train and compete in a virtual world.” -Wikipedia] That neon bike is commonly known as the “Tron” bike and formally referred to as the “Zwift Concept Z1 Bike.” It is colorful and it is fast. This article will divulge some hacks to unlock your Tron Bike quicker.

Author’s avatar on his Zwift Concept Z1 (Tron) bike on top of the Radio Tower climb with Alpe du Zwift in the background. He accumulated 65% of the 164,000 feet of elevation in the final 7 weeks. The hacks enabled increased weekly-elevations of 7113, 6115, 14547, 16710, 15925, 21512, and 24540 feet. Image used by permission of Zwift.com.

There are some basics to “unlocking” the Tron bike that I will not cover in detail. For example, you need to sign up for the Everest Challenge (I wish someone had told me that three years ago). Those basics have been covered by others [https://zwiftinsider.com/tron-bike/].

The main requirement to unlock the Tron is the accumulation of 50 kilometers of climbing…. that’s 164,042 feet. If you rode the Tempus Fugit route every day (52 feet of climb) it would take you 3,155 days. If you rode the Road to Sky route every day (3428 feet) it would take you 48 days.

Another way to look at this is … How much time would it take to accumulate 164,042 feet at a given speed on a given slope? For example, 10 mph up a 5% slope equals 0.5 miles-of-climb-per-hour or 2640 feet-per-hour.

Vup = V x slope — [Rate-of-Climb = bike velocity x slope]

That Rate-of-Climb would require 62 hours to unlock the Tron bike. From this you can see that getting the Tron bike is not an impossible task if you ride some hilly routes (not Tempus Fugit). But before we talk about routes, let’s talk about the physics.

Your pedal power (watts) that moves your Zwift avatar is expended (for simplification) in three ways: 1) changing elevation, 2) rolling and frictional losses and 3) aero drag losses.

The power required to maintain a specific Rate-of-Climb is easy to calculate.

Equation (i): Pup = Vup x m x g — [power = Rate-of-Climb x mass x gravitational constant]

For example, take the 10 mph on a 5% slope discussed above with the cyclist+bike weighing 70 kg. This becomes:

0.5 mph x .447 (M/s)/mph x 70 kg x 9.8 M/s2 = 153 watts (NM/s)

This is the minimum wattage needed to maintain that Rate-of-Climb. More power is needed to overcome the frictional, rolling, and aero losses. Those losses are a function of velocity (the losses are smaller at lower velocities). We will talk about that in a minute, but let’s take one last look at Equation (i) written a different way:

Vup = Pup/(m x g)

To maximize Rate-of-Climb, Vup, we want to maximize power and minimize mass (g is a constant). Hey… that’s watts per kilo! Now you understand the cyclist’s obsession with watts per kilo. For a climber, it is all about watts per kilo. In fact, you can quickly calculate your theoretical vertical speed in feet per hour by multiplying your watts per kilo* by the conversion factor of about 1200. For example, 2.0 w/kg* converts to 2400 feet per hour of elevation gain.

[*Note that throughout this article, “m” or “mass” is the combined weight of cyclist and bike. The “w/kg” numbers all use that definition of “mass.” The “w/kg” reported by Zwift on their data displays does NOT include the weight of the bike. To compare your w/kg with the data in this blog, you must add a bike weight. Zwift does not disclose the weights of their frames and wheels. I have used a climbing-bike weight of 15.7 lbs (7.1 kg) which was the average bike weight at the 2021 Tour de France. (See Table 4.) Strangely, the Rates-of-Climb I measured on Zwift are faster than theoretically possible by a few percent. Perhaps my bike set up is lighter than 15.7 lbs or I was inputting more power than the erg setpoint? We know Zwift uses the weight of the bike in their algorithm. See link in next paragraph.]

Maximizing power and minimizing weight is so logical, that equations are superfluous, but now you have a feel for what the Zwift engine is doing. To minimize mass you could lose some weight, but I will leave that up to you. You should go to your “Zwift Garage” and select the lightest frame and wheelset available. This has been written about by others here: https://zwiftinsider.com/fastest-bike-alpe/

To further maximize your Rate-of-Climb, Vup, you would like the majority of your power expended on elevation gain and not expended on rolling and aero resistances. To keep rolling and aero resistances small, you want your velocity low, which means picking the steepest climbs possible. Others have discussed the optimal Zwift routes (see https://zwiftinsider.com/easiest-tron/ ), but my experience is that the climb to the Radio Tower is best for highest Rate-of-Climb. The Radio Tower climb is consistently over 10% slope so V is low, meaning that most of your power is going into elevation gain.

Rates-of-Climb (ft/hr) on Radio Tower for various w/kg* are shown below. In most instances, the Rate-of-Climb exceeded the theoretical maximum. I can’t explain why that is happening, but it does confirm that the Zwift algorithm calculates the losses due to friction, roll and drag to be very small.

Table 1. Riding up the 450 foot climb of Radio Tower from bottom of Bowl (more data in Figure 1):

watts/kg* Rate-of-Climb Theoretical % Diff
1.59 1970 ft/hr 1908 ft/hr -3.3%
2.38 3066 ft/hr 2856 ft/hr -7.4%
3.04 3778 ft/hr 3648 ft/hr -3.6%

Reverse Epic KOM climb, Bonus Climb (Radio Tower), and “Bowl”. Base Image used by permission of Zwift.com.

HACK #1

2D Elevation of Shorelines and Summits Route. Hack#1 starts at about the 26-mile marker and proceeds in reverse, up the Epic KOM to the Radio Tower. Used by permission of VeloViewer powered by Strava. See full details here.

The best way to get to the Radio Tower climb and still get in some climbing on the way is to select the Jungle Circuit Route. Do an immediate U-turn. Within the next minute you will get an intersection warning. Select to go right onto the Reverse Epic KOM climb. In about a minute you are into good climbing, with no power wasted on flats or downhill.

You will be using the U-turn function a lot in my hacks, so figure out how to use it effectively. I use the down arrow on my keyboard which is easily reachable. The key needs to be held for a second or two before the turn is executed.

HACK #2

Create a custom workout for your climbs and execute in erg mode. This will enable you to maintain a normal cadence and prevent you from overdoing it. A link to a custom workout that works for a wide variety of riders is given at the end of this article. It is mostly in Zone 2. Long aerobic workouts are best for accumulating elevation day after day.

HACK #3

When you get to the top of Epic KOM via the reverse route (~1100 feet of climbing) you will take a right turn onto what is called “Bonus Climb” or more commonly the Radio Tower. This is about 500 feet of very steep climbing. I usually do a U-turn as soon as the slope drops below 10% near the top of the climb, head back to the bottom, U-turn at the bottom and do it again, and again, and again.

Table 2. Riding up and down Radio Tower (the complete loop):

watts/kg* Rate-of-Climb
1.59 1997 ft/hr
2.38 2953 ft/hr
3.04 3617 ft/hr

A “custom Zwift workout” could consist of alternating blocks of “climbing” and “descending.” You want to expend energy on the climb and save it on the descent. Make the blocks longer than it will actually take you to climb or descend, then make use of the “Tab” key. The “Tab” key skips to the next block. For example: create two blocks of 15 minutes @ 80% ftp and 2 minutes @ 40% ftp. If you get to the top in 9:09 (at 80%ftp), U-Turn, and hit the Tab key to skip to the descend block. When you are done descending and are climbing again, hit the Tab key to skip to the next “climbing” block.

HACK #4

Do you remember your physics lessons on potential energy conversion to kinetic energy? Usually, the teacher released a ball at the top of a ramp. The ball accelerated as it descended. Maybe there was an up-ramp abutting the down-ramp. The ball ascended the up-ramp, stalled, descended again, then oscillated between the two ramps. Without frictional and rotational losses, the ball could oscillate forever as potential energy is converted to kinetic energy and back, much like skateboarders with their half-pipes. If you could find two opposing ‘ramps’ in the Zwift world, could you accumulate more feet of climbing by oscillating back and forth than by doing a long climb like Radio Tower?

Equation (ii) for a frictionless ramp shows that a doubling of the slope will double the Rate-of-Climb. Doubling the height of the incline (making the ramp longer) only increases the Rate-of-Climb by 21/2.

Equation (ii): Rate-Of-Climb = (g/8)1/2 x s x (H)1/2 — where H is the vertical height of the incline, s is slope and g is gravitational constant

For example, a ramp of 11% slope and a height of 21 feet gives a Rate-of-Climb of 3637 ft/hr. [Note this is approximately the conditions of the 1.59 w/kg* experiment in Table 4, which had a Rate-of Climb of 3792 ft/hr.]

There is an interesting “Bowl” (two-sided-ramp) at the start of the Radio Tower climb. Both sides have maximum slopes greater than 12%. I tested this “Bowl” at several w/kg*.

Table 3. Rate-of-Climb in Bowl vs. Radio Tower Loop:

watts/kg* Rate-of-Climb in Bowl Advantage vs Up/Dwn Radio Tower at same w/kg Theoretical w/kg for this Rate-of-Climb
1.59 3792 ft/hr 90% 3.2 w/kg
2.38 4704 ft/hr 59% 3.9 w/kg
3.04 5548 ft/hr 53% 4.6 w/kg

To my shock, I accumulated almost 60% more feet in elevation per hour by cycling back and forth across this bowl than going straight up and down the Radio Tower! To get that rate-of-climb using equation (i) would require 3.9 w/kg (for me that equates to 265 watts or 126% of my ftp!) At 1.59 w/kg the results were even more astounding: a 90% increase in Rate-of-Climb! The lower speeds at lower w/kg correspond to less aero and rolling losses. Conversely, if you do this Bowl at higher w/kg, you will experience less advantage, but it will still be worth implementing the Hack.

HACK #5

There is something very interesting about Equation (ii) … “mass” does not appear in this equation! This would indicate that riding the bowl should not be adversely affected by a heavier bike? In fact, high speeds are attained at the bottom of the bowl where aerodynamics come into play. You can take advantage of this by switching to a heavier aero frame and wheels when you get to the Bowl. Switching bikes in-game is easy to do. [See www.zwiftinsider.com/change-bikes-quickly/]

I confirmed this in a test with two different bikes in the Bowl. [Note…My choice of equipment was limited by what was in my garage (many frames and wheels are level-locked).] The Time Trial bike’s Rate-of-Climb was over 7% more than the Climbing bike … over 300 extra feet per hour! To achieve either of those Rates-of-Climb on a normal uphill would require around 4 watts/kg!

Table 4. Aero vs Lightweight in the Bowl

Set-Up Lightweight Climbing Time Trial Aero
Frame Cannondale EVO Canyon Speedmax
Frame Zwift Aero Stars 2 4
Frame Zwift Weight Stars 4 1
Wheels Zipp 353 NSW Zipp 454
Wheels Zwift Aero Stars 3 4
Wheels Zwift Weight Stars 3 3
Assumed weight for w/kg 7.1 kg 9.1 kg
Power Input 70% ftp 70% ftp
Watts/kilogram* 2.22 2.16
Rate-of-Climb in Bowl 4493 ft/hr 4824 ft/hr

CONCLUSION

Unlocking the Tron Bike is one of the coolest achievements on Zwift. These hacks can get you there quicker. Using Figure 1 you can predict how many hours it will take you to get there. If you can maintain 3 w/kg, your RoC on the Radio Tower climb is about 4000 ft/hr. You can accumulate the 164,000 feet in 41 hours. Interestingly, if you can only maintain 1.5 w/kg, but you spend your time in the ‘Bowl,’ you have about the same RoC.

Figure 1. Rate-of-Climb for different scenarios


In the process of learning about these HACKS and why they work, I hope I have refreshed your understanding of some of the physics of cycling. Knowing the science can help you bike smarter.


==============================================================

*All references to “w/kg” include the weight of the bike and are not directly comparable to “w/kg” reported on the Zwift data screens which only includes the weight of the rider. To convert, multiply the Zwift number by (cyclist kg)/(cyclist+bike kg).

CUSTOM ZWIFT WORKOUT

I have created a workout that leads you through the HACKS. You can download it from here:

https://www.dropbox.com/scl/fi/tefhztfep6vvivw2xus45/Jungle_Circuit-Tron_Hacks-V01-02.zwo?rlkey=x0wyynfi8mrm2qpydg2bl8fi3&dl=0

After you have downloaded it, save it to Documents/ZwiftWorkouts/[YourZwiftID] and then start Zwift. [If you are having trouble, video instructions are here: Importing Custom Workouts – Instructions | Zwift] This workout is called Jungle Circuit-Tron Hacks-V01-02 and will now appear under the “Custom Workouts” category in the workouts list. It is designed to be ridden in “erg” mode on the JUNGLE CIRCUIT route in Watopia.

Do not be alarmed at the “length” of the workout. It is made to suit a wide variety of riders. You will be “tabbing” through some of the long blocks. If you are a less powerful rider you will be instructed to “tab” (skip) many of the blocks. Most riders will get the full experience in 60 minutes.

You will need access to a keyboard to use the workout effectively. Here are the keyboard shortcuts to know:

Action Keyboard Shortcut
U-Turn Down Arrow (Press and Hold)
Select turn at upcoming intersection Right Arrow
Skip out of current workout block Tab
Stop Game to change bikes A
Open Garage to select frame and wheels T

Growing in Triathlon by Volunteering and Relay Racing

October 14th, 2023 by JoAnn Cranson

By: Brie Siems

My name is Brie Siems and I am 14 years old. I am a freshman at Hackett Prep. I enjoy being  outdoors and have a passion for being active. I  participate in many sports such as soccer, swimming, running, basketball, and skiing.  I like triathlons because they include swimming and running. This past summer, I competed in many triathlons in addition to running in multiple 5k races in the area.

My brothers and I volunteered at the Kid’s MiTi triathlon in Grand Rapids this past August. I really enjoy volunteering at races. I watched so many kids arrive in the transition area to set up.  They were so happy and excited. For some of them, this was their first kid’s triathlon ever. I was able to help set up the food table and mark the kids’ arms and legs. It was fun to see all of the kids gathered at the water start. I helped some kids get their socks on in transition and take their heavy bikes off of the rack for them. I was even able to hand out all of the medals to the kids when they finished. It wasn’t that long ago that I was one of those kids who was new to triathlons and learning the basics. Now, I am helping kids in the race. It’s a good thing to give back and encourage others who are new to triathlons.

I also had the opportunity to race in the MiTi Olympic Relay triathlon the next day with my two brothers, Kellen (14) and Sean (16). This triathlon is a 1500m swim, 40k bike and 10k run. I was encouraged to do the swim leg.  The swim course looked very long and it was my first time swimming this distance with no break. It was also my first time racing in a wetsuit, which really does improve speed and comfort in the water.  Luckily, I have been training on a swim team so I was ready!  We all have strengths and weaknesses,  but it was perfect because I was better at swimming. The race ended well with each of us getting a finisher medal and a 3rd place overall Olympic Relay medal. My brothers and I worked hard but also worked well together as a team.  

Athletic Mentors provides great support and opportunities.  In addition to helping with gear, it provides a network of people that help you out.


Realizing Your Potential: Getting Faster in Your 30’s with Expert Coaching and Consistent Training

October 3rd, 2023 by JoAnn Cranson

By Jeremy Sikkema

Triathlons are a test of physical and mental endurance, requiring participants to excel in swimming, biking, and running. While many may believe that aging marks the decline of athletic prowess, this could not be further from the truth. With the right guidance and a commitment to consistent training, athletes can not only maintain but also enhance their performance in triathlons.

In your 30’s, you might have more responsibilities and a busier schedule because of items such as kids and work. This makes the quality of your training sessions just as important as the quantity. By having a good coach and consistently following a training plan I have been able to go from a middle-of-the-pack athlete to one that is competing at the front of the race in both short and middle-distance triathlons.

In 2015, at the age of 30, I completed the Shermanator sprint triathlon, finishing in 27th place with a time of 1:07:48. While this was already a respectable feat, fast forward eight years to 2023, and I emerged as the overall winner of the Shermanator triathlon, completing the race in 53:32. The result is an example of the potential for improvement, even as one progresses through their 30s.

The Consistency Factor

While talent is undoubtedly important, consistency is the true cornerstone of success in any athletic endeavor. Maintaining a consistent training routine becomes even more critical. Here’s how consistent training impacts your triathlon journey:

  • Building Endurance – Consistent training gradually builds endurance, which is crucial for completing the varying distances of a triathlon. Regular sessions condition your body to handle the demands of the race, preventing burnout on the big day.
  • Muscle Memory – As you repeat the three disciplines of swimming, cycling, and running, your body develops muscle memory. This means your movements become more efficient, leading to improved performance and reduced energy expenditure.
  • Moderating Plateaus – Progress isn’t always linear, and training plateaus are common. However, with consistent training, you can push through these plateaus and continue to see improvements over time.
  • Injury Prevention – Consistency also plays a role in injury prevention. Gradually increasing your training load with regularity allows your body to adapt and grow stronger without succumbing to overuse injuries.

The Power of Coaching

A key factor in accelerating your progress in triathlons is the presence of a skilled and knowledgeable coach. Coaches bring a wealth of experience, technical expertise, and personalized guidance to the table, tailoring their approach to your individual needs and goals. Here’s how a good coach can make a significant difference:

  • Customized Training Plans – A coach will design training plans that align with your current fitness level, taking into account any pre-existing conditions or limitations. This tailored approach minimizes the risk of injuries while maximizing progress.
  • Goal Setting – A coach helps you set realistic yet challenging goals, breaking down your long-term objectives into smaller, achievable milestones. This approach keeps you motivated and focused on continuous improvement.
  • Technical Expertise – Triathlons require mastering three distinct disciplines. A coach can refine your swimming technique, enhance your cycling efficiency, and optimize your running form. These technical adjustments lead to improved overall performance.
  • Monitoring and Feedback – With regular assessments and feedback, coaches ensure that you’re on the right track. They can analyze your performance metrics, suggest adjustments, and provide insights for ongoing enhancement.

Training Smarter, Not Just Harder

First Triathlon

In 2018, I undertook my first half-distance triathlon at the Grand Rapids Triathlon, completing the race in 5:30:33. Five years later, in 2023, a dramatic change in results unfolded when I crossed the finish line in 4:44:32. The highlight of this journey was the biking segment that allowed me to bridge to the front of the race and enter T2 in second place.

Embarking on a journey to complete and/or get faster at triathlons as you age is a testament to your determination and commitment to self-improvement. Through the guidance of a good coach and consistent training, you can shatter the misconception that age hinders athletic achievements. Remember that progress might be gradual, but each step forward brings you closer to realizing your full potential as a triathlete.

So, lace up your running shoes, hop on your bike, and dive into the pool with renewed vigor. With the right mindset and consistently following a well-structured approach, you can thrive as a triathlete well into your 30’s and beyond. The finish line awaits – and it’s never been closer.


Can Mere Mortals Learn Anything From The 2023 Tour de France Stage 16 Time Trial?

September 21st, 2023 by JoAnn Cranson

By: Jay Campbell

On July 18, 2023 the top cyclists in the world raced a 22.4 km time trial on a hilly course that ended with a 2.5 km climb at 9.4%.

You can watch the highlights here: https://www.nbcsports.com/watch/highlights-2023-tour-de-france-stage-16

These are my takeaways for us mere mortals trying to get faster at the cycling leg of a triathlon.

  1. Workout in the aerobars as much as you can!!! There is a very old study that measured peak power in upright and aero positions for elite cyclists vs. triathletes. Triathletes had higher peak
    power in the aero vs. upright position while it was the opposite for cyclists. [Peveler, W. et.al. Effects of Training in an Aero Position on Anaerobic Power Output, J. Exerc. Phys., 2004 7(5), p.
    52.] Not surprising. Athletes are strongest in the position they train in. I am continually amazed at how many of the Tour de France cyclists “sit up”; during the time trials, but then that is how they race and train. It shouldn’t be surprising however that the winner of the time trial stayed in the aero bars all the way through his final sprint. It is the most efficient position IF YOU HAVE TRAINED FOR IT. I know training in “aero” is not possible when riding with groups. But, with all the time most of us spend on a trainer, there is no excuse for not doing the bulk of that in aero.
  2. If you have the cash, buy a rear disc wheel, aero socks, and aero helmet. Every rider in the time trial was outfitted with this gear (actually I think I saw one rider in a road helmet). The aero advantage of these items has been shown in the wind tunnel on a wide variety of riders. In triathlon we still do not have the limitations on sock height that the Tour has. I am convinced that just about any sock is “aero” and the more sock the better. So pull on those full length compression socks if you don’t mind having a long transition (or are doing a duathlon.) If you are in the market for an aero helmet, check out Smith’s helmet –“Jetstream TT” helmet.  The innovative helmet (“Redeemer”) worn by the Uno-X Pro Team at the Tour is on a whole new level – very unusual design and is not available to the public yet.
  3. Wear long-sleeves? About 90% of the riders had long-sleeve speed suits despite temperatures close to 90F. All of the top 5 finishers had long-sleeves. OK…maybe you are not ready for that, but at least go short sleeve vs. sleeveless. The aerodynamics on this are well established. I have seen some “arm-coolers” at Nationals. They are worn like arm-warmers but are well-ventilated and aero.
  4. Workout in the aerobars as much as you can!!! DIDN’T I ALREADY SAY THIS? I tried to count the number of riders who switched from a time trial bike to a road bike for the final climb. [A bike change in the middle of a stage of the Tour is not that unusual.] I estimate it was about half including the #2 finisher, but not the other four in the top five. Switching to a lighter bike when gravitational forces predominate over aerodynamic forces often makes sense. I also tried to determine under what conditions riders “sat up” or “stood”.  Generally, they “stood” when
    speeds dropped below 10 mph (only on one very steep section) and when sprinting at the end.  The best time trialists were only coming out of the aero bars when their speed dropped below
    16 mph. Many riders “sat up” when their speeds dropped to 20 mph. However, even at 16 mph there is significant drag making the aero position beneficial (IF YOU HAVE TRAINED FOR IT). I have heard arguments that it makes no sense to “stand” for the final 100 meters of a time trial as the increased drag wipes out the additional watts generated by standing. Maybe the winner of the time trial believes those arguments, as he remained in the aero bars during the final sprint. He was the only finisher I observed who chose to do that.

HERE IS A DRILL: Do a hilly workout while staying in the aero bars the entire time. It is true that when you are going very slow up a hill there is little advantage to be in the aerobars, but it will make you stronger in the aero position. You will be like the triathletes discussed above who actually have a higher peak power in the aerobars vs. upright. Now you can reserve “sitting up” for the occasions where you need to stretch or slightly change muscle groups.

To answer my own title-question, there are a few things triathletes can learn from the Tour de France Pros. But your time is better spent watching the triathlon pros. Only triathletes would think of stuffing a water bottle down the front of their jerseys to get more aero. (See Gustav Iden.)  https://www.triathlete.com/gear/bike/expert-tested-the-water-bottle-jersey-trend-produces-shocking-
results (607) Fast or Fiction: Does a bottle down the front of your kit make you more aero? – YouTube.

Now get on the bike and in your aerobars!


Why I Chose Triathlon

May 8th, 2023 by JoAnn Cranson

By:  Olivia Perrine

I got into triathlon by accident, all because of a twisted ankle. It was my aunt’s twisted ankle. She was signed up to race the Tri Goddess Triathlon with my mom in August of 2022, but after a training session that was a little too intense, she was left with a sprained ankle and unable to race. When my mom explained to me my aunt’s situation, she went on to say that, “I didn’t want to race alone, so I just signed you up.” That was on Monday, and the race was on Saturday. It wasn’t much of a heads up, but I didn’t really mind. Earlier in the month I had debated joining my mom and aunt anyways, but I never brought myself around to doing it. Now the decision was made for me. Despite being somewhat unprepared (I had done plenty of running over the summer but little to no swimming or biking), I was excited for the race. I am competitive by nature, I like to challenge myself, and it makes me happy to be active outside, so I knew I would have fun. 

I did have fun, and though I was sad my aunt couldn’t be there, I was glad that I got to participate. I was proud of myself for stepping outside my comfort zone to try something new and challenging. The whole racing experience was unlike anything I had ever done before, and it was thrilling. From the hectic transition periods, to running with jello-legs after biking, to running through the woods before the finish, I loved every second. I enjoyed the race, and knew it was something I would do again next summer, but I didn’t think about it beyond that. So when I was asked if I wanted to be part of Athletic Mentor’s triathlon team, I responded mainly with surprise. My only experience with triathlon was from the one race I did with my mom. I didn’t know that there were competitive teams for kids my age. But as I learned more about it and talked with my parents about what it would look like, I could feel myself getting excited. Being part of a team would mean that I would be more exposed to the world of triathlon, a world into which I had only a glimpse. Ultimately, I decided to become an Athletic Mentors triathlete to challenge myself, to supplement cross country, and because I want to do an Ironman some day. 

First, I decided to become a triathlete to challenge myself. It is easy for me to stay in my comfort zone and avoid situations that are new because they are uncomfortable. But when I avoid those new situations, I stay stagnant. I want to grow, learn, and improve, and no one can do that when they are avoiding change. Becoming a triathlete, though exciting, would be a challenge. Like any sport, it takes hard work to be good. For me, it would take hard work to get better at swimming. The process of improving will be uncomfortable at times. I knew this, and it initially was a cause for apprehension, but I soon realized it was actually a perfect opportunity to get better.

Another reason I wanted to become a triathlete was because I knew it would help me be a better cross country runner by making me stronger and giving me more race experience. There have been countless studies that show how cross training improves an athlete’s overall strength and prevents injury. This is because when you use your body in different ways you use different muscles. So instead of getting all my training from running (which is hard on the body and could lead to injury), I will get endurance work and strength from swimming and biking that will prevent injury. In addition to cross training, racing triathlons will benefit my cross country season by getting me more familiar with competing. Though the environment at a triathlon is different from a cross country race, it is still a race and will therefore help me become more comfortable with a race-atmosphere. The more competitions you do, the better a competitor you will be in terms of strategy and mental toughness.  

Finally, I chose triathlon because I want to do an Ironman some day. An Ironman consists consecutively of a 2.4 mile swim, a 112 mile bike, and a 26.2 mile run. Endurance sports are my strength, and I think an Ironman would be a great test of that strength. By starting triathlon training now, I will gain experience and build a training base that will prepare me for the Ironman training and race. 

Whether by action or by choice, no matter what your goals are, I have found that choosing triathlon is a fun way to challenge yourself.


6 Tips To Help You Keep Your New Year’s Resolution Into February

February 10th, 2023 by JoAnn Cranson

By:  Raquel Torres

The new year often feels like a fresh start and a great opportunity to change bad habits and establish new routines that will help you grow psychologically, emotionally, socially, physically, or intellectually.

Chances are at some time in your life, you’ve made a New Year’s resolution — and then broken it. This year, stop the cycle of resolving to make change and then not following through. If your resolution is to take better care of yourself and get healthy, you will have a much better year if your resolution sticks.

According to statistics one third of resolutioners don’t make it past the end of January.

A lot of these resolutions fail because they’re not the right resolutions. And a resolution may be wrong for one of three main reasons:

  • It’s a resolution created based on what someone else (or society) is telling you to change. 
  • It’s too vague.
  • You don’t have a realistic plan for achieving your resolution.

Your goals should be smart. 

How to set achievable new year goals

Ever heard of a SMART goal? SMART stands for specific, measurable, attainable, relevant, and timely. It’s an acronym used a lot in business, and also one that fitness professionals rely on to help clients set doable goals. It’s also pretty handy for any New Year’s resolutions you’re mulling over right now. 

Making a goal SMART is a great tactic to increase your chances of actually sticking with it. For many common New Year’s resolutions—like exercising more, changing eating habits, and saving money—implementing this method can really help.

Whatever your goal is – the important thing is that you are on the right path to achieve it. Read through these tips to help you stick to your New Year resolutions and maximize your chances of not giving up.

  1. Start with SMALL goals

You may be feeling motivated and excited about your goal, but don’t let your ambition lead you to unattainable levels. If you want to try a new activity, don’t commit yourself to 5 times a week – start slowly and consistently so that your body and mind gets used to it, and build from there. Giving yourself the ability to meet your goal in small steps can help you avoid discouragement along the way.

  1. Seriously, get SPECIFIC with your goals

Setting small, specific goals also keeps you encouraged along the way—“Save money” is a good goal. But…how? And how much? Without some definable parameters, your best intentions can get lost in the shuffle. “The more detailed you can be—‘I’m going to save $30 a week by eating out one fewer meal’—the [easier] it is to stay focused on what you have to do to succeed,” each time you meet one, you have reason to celebrate your progress.

  1. BE REALISTIC

The surest way to fall short of your goal is to make your goal unattainable. For instance, resolving to NEVER eat your favorite food again is setting you up to fail. Instead, strive for a goal that is attainable, such as avoiding it more often than you do now.

  1. TALK ABOUT IT

Don’t keep your resolutions a secret. Tell your mentor, coaches or friends and family members who will be there to support your resolve to change yourself for the better or improve your health. The best-case scenario is to find a buddy who shares your New Year’s resolution and motivates each other.

  1. STICK TO IT

Experts say it takes about 21 days for a new activity to become a habit and six months for it to become part of your personality. It won’t happen overnight, so be persistent and patient.

  1. KEEP TRYING

If you have totally run out of steam when it comes to keeping your resolution by mid-February, don’t despair. Start over again! Recommit yourself for 24 hours. You can do anything for 24 hours. The 24-hour increments will soon build on each other and, before you know it, you will be back on track.

Remember That Change Is a Process.

Those unhealthy or undesired habits that you are trying to change probably took years to develop, so how can you expect to change them in just a matter of days, weeks, or months? Be patient with yourself. 

Identify the right resolutions to improve your life, create a plan on how to reach it, and become part of the small group of people that successfully achieve their goals.


Race Recap – Dirty Mitten Gravel Triathlon

October 18th, 2022 by JoAnn Cranson

By:  Jeff Nordquist

Gravel racing meets triathlons in The Dirty Mitten in Middleville MI. I decided to race the Long Course on Sunday which is equivalent to the standard Olympic distance triathlon. The race directors shortened the swim distance which measured 1200 m and the bike route was just under 30 miles. Both of these changes didn’t cater to my strengths.

The forecast called for rain all morning, so I was anticipating a messy day of racing. The swim wasn’t  much of a challenge, temps were high 60’s and felt great through the two-loop course. I had a 45 second lead out of the water and tried to capitalize on this with the longer trek up to the lodge for transition.

I settled onto my bike saddle and took in some nutrition before hitting the gravel roads. Biking is not my strong suit, so I knew I was going to see a few riders soon. At Mile 4 I was caught by one and we worked off each other for another 10 miles sharing the workload (drafting is legal in gravel triathlons). Just before we reached Sager Rd, I was dropped and then I struggled on Sager. This portion was nearly 2 miles long of sandy two-track and it whopped me, I had to dismount up two slippery climbs. My front wheel found a root just beneath the soft sand and it threw me over the bike, I’m sure it looked graceful but I picked myself up and rode solo all the way back into the transition.

I wasn’t too confident with my run legs, but knew I was in 3rd place leaving transition and felt I could close the gap. I maintained even splits for the first 5 k trail loop passing 2nd place at the same time. I pressed to keep him off my heels and never saw him again. I was in a solid 2nd place for loop 2 and crossed the line to finish 2nd overall. I was really hoping to come away with the victory here, but considering my bike course struggles, I was ultimately happy with a podium finish.

There is much to learn with this new format for triathlons and I’m excited to see more of these races appear in the coming years


Metabolic Testing for the Average “Jo”

September 14th, 2022 by JoAnn Cranson

By:  JoAnn Cranson

I’m always trying to learn more about my body and how to manage staying healthy, burning fat and keeping my weight in check. I’m not a pro racer but I do like to exercise and compete. My latest bucket list item is to run my first Marathon.

Well, the first thing I’m discovering as I increase my miles is that I am not fueling enough during my run. The best way to figure out fueling is to do Metabolic Efficiency Testing.

Metabolism is how your body converts food into fuel to power your body. When you breathe, oxygen is carried to your muscles where carbohydrates and fats are used as fuel to create energy to keep the muscles working. Your body’s preferred fuel source is fats. It relies on oxygen (aerobic) and produces more energy. Alternatively, carbohydrates don’t rely on oxygen and provide quick bursts of energy.

However, your body only has a small storage of carbohydrates, so this is why we need to fuel adequately and frequently with carbohydrates during endurance exercise (Over 2 hours). Ideally we don’t want to have to rely on carbohydrates for all our fueling if we can train our body to use our fat stores for longer periods of times and increasingly higher intensities.

Your metabolism is unique to you! It not only refers to the way our body regulates our weight but also includes all of the chemical processes within our bodies that help to maintain normal function.

What I wanted to know what is my Metabolic Efficiency? In other words, how much fat am I burning and how many carbohydrates do I need to take in during my Marathon to run my best? Plus, I want to teach my body to burn more fat so I preserve the carbohydrate stores. This test will tell me at what heart rate, pace or power my body burns fat the best, and how I can improve that over time. The less I need to eat while I’m running the better it is for me and my digestion, yet not enough could potentially allow me to bonk!

I went to Athletic Mentors gym in Richland, Michigan to get this testing done. They had some questions that I answered ahead of time and I had the option to run on a treadmill or cycle on a trainer for this test.

I fasted for 12 hours and arrived for my test in comfortable running clothes. Jess was so friendly and helped me feel at ease by explaining everything as we got started. She checked my blood pressure, pricked my finger to measure my glucose, I put on a heart rate strap and she fitted me with a mask until I was comfortable in it. The mask and tubing were attached to a KORR machine and her computer setup.

Each test is tailored to your specific goals of what you want to learn about yourself. Some people want to know exactly how metabolically efficient they are while others are specifically looking for a fueling strategy at a certain target race pace. We started with a slow walk and very gradually eased into a run. Each phase was clearly communicated and she was always making sure I was comfortable and communicating my energy output before going to the next step.

After the test is complete, you will have a personal consultation about your results. My results showed I do burn a decent amount of fat vs carbohydrate at my 9:22/mile run pace. The information also shows me how many grams of carbs I should consume every hour for my long runs.

My long-term goal is to improve my body to preferentially use fats as the main fuel source for as long as possible. From the test, I know my target zone (heart rate and pace) to gradually get my body to use more fats as a fuel source for as long as possible. As my body adapts to using fats more, I’ll see an improvement in this speed and heart rate. Along with this, I need to be aware that I’m eating a balanced diet of healthy fats, protein and complex carbohydrates.

Check out Athletic Mentors and set up your Metabolic Efficiency Test. (Click the link and it will explain everything along with the reasonable cost to have it done.) Whether you want to learn more about your personal health or you have an upcoming goal race, it’s so worth it to learn more about how your body operates.

This average “Jo”Ann is enjoying learning more about staying healthy and being more prepared to check off another item (Running a Marathon) on my bucket list!


SPONSORSView All


Team Athletic Mentors
© 2024 - Team Athletic Mentors