Elite Cycling

Barry-Roubaix Psycho Killer – 100 Miler – 2021 Race Recap

November 24th, 2021 by JoAnn Cranson

By:  Jared Dunham

Barry Roubaix is a uniquely Michigan festival of gravel that generally starts the season off. However, this year things were a little different. Due to rescheduling from COVID, we experienced the race in early October, just as the leaves began to change and Iceman prerides become a regular thing on weekends.

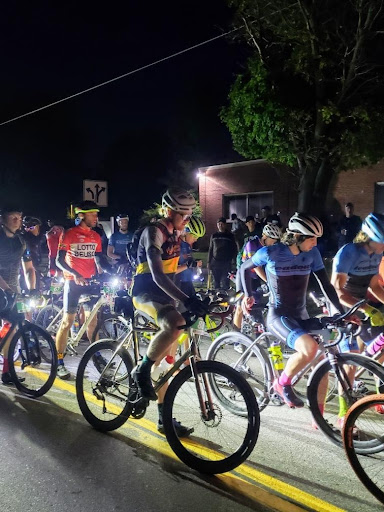
Barry has four distances to choose from, the 18-mile Chiller, 36-mile Thriller, 62-mile Killer, and 100-mile Psycho Killer. No matter the distance, Barry never shies away from a healthy serving of elevation on each route. However, the 100 miler has approx. 6,800ft of climbing and showcases the most remote two-track that Barry county has to offer. This was my first experience tackling the Psycho Killer, but after a year’s worth of long rides, I was confident in my abilities going into the event.

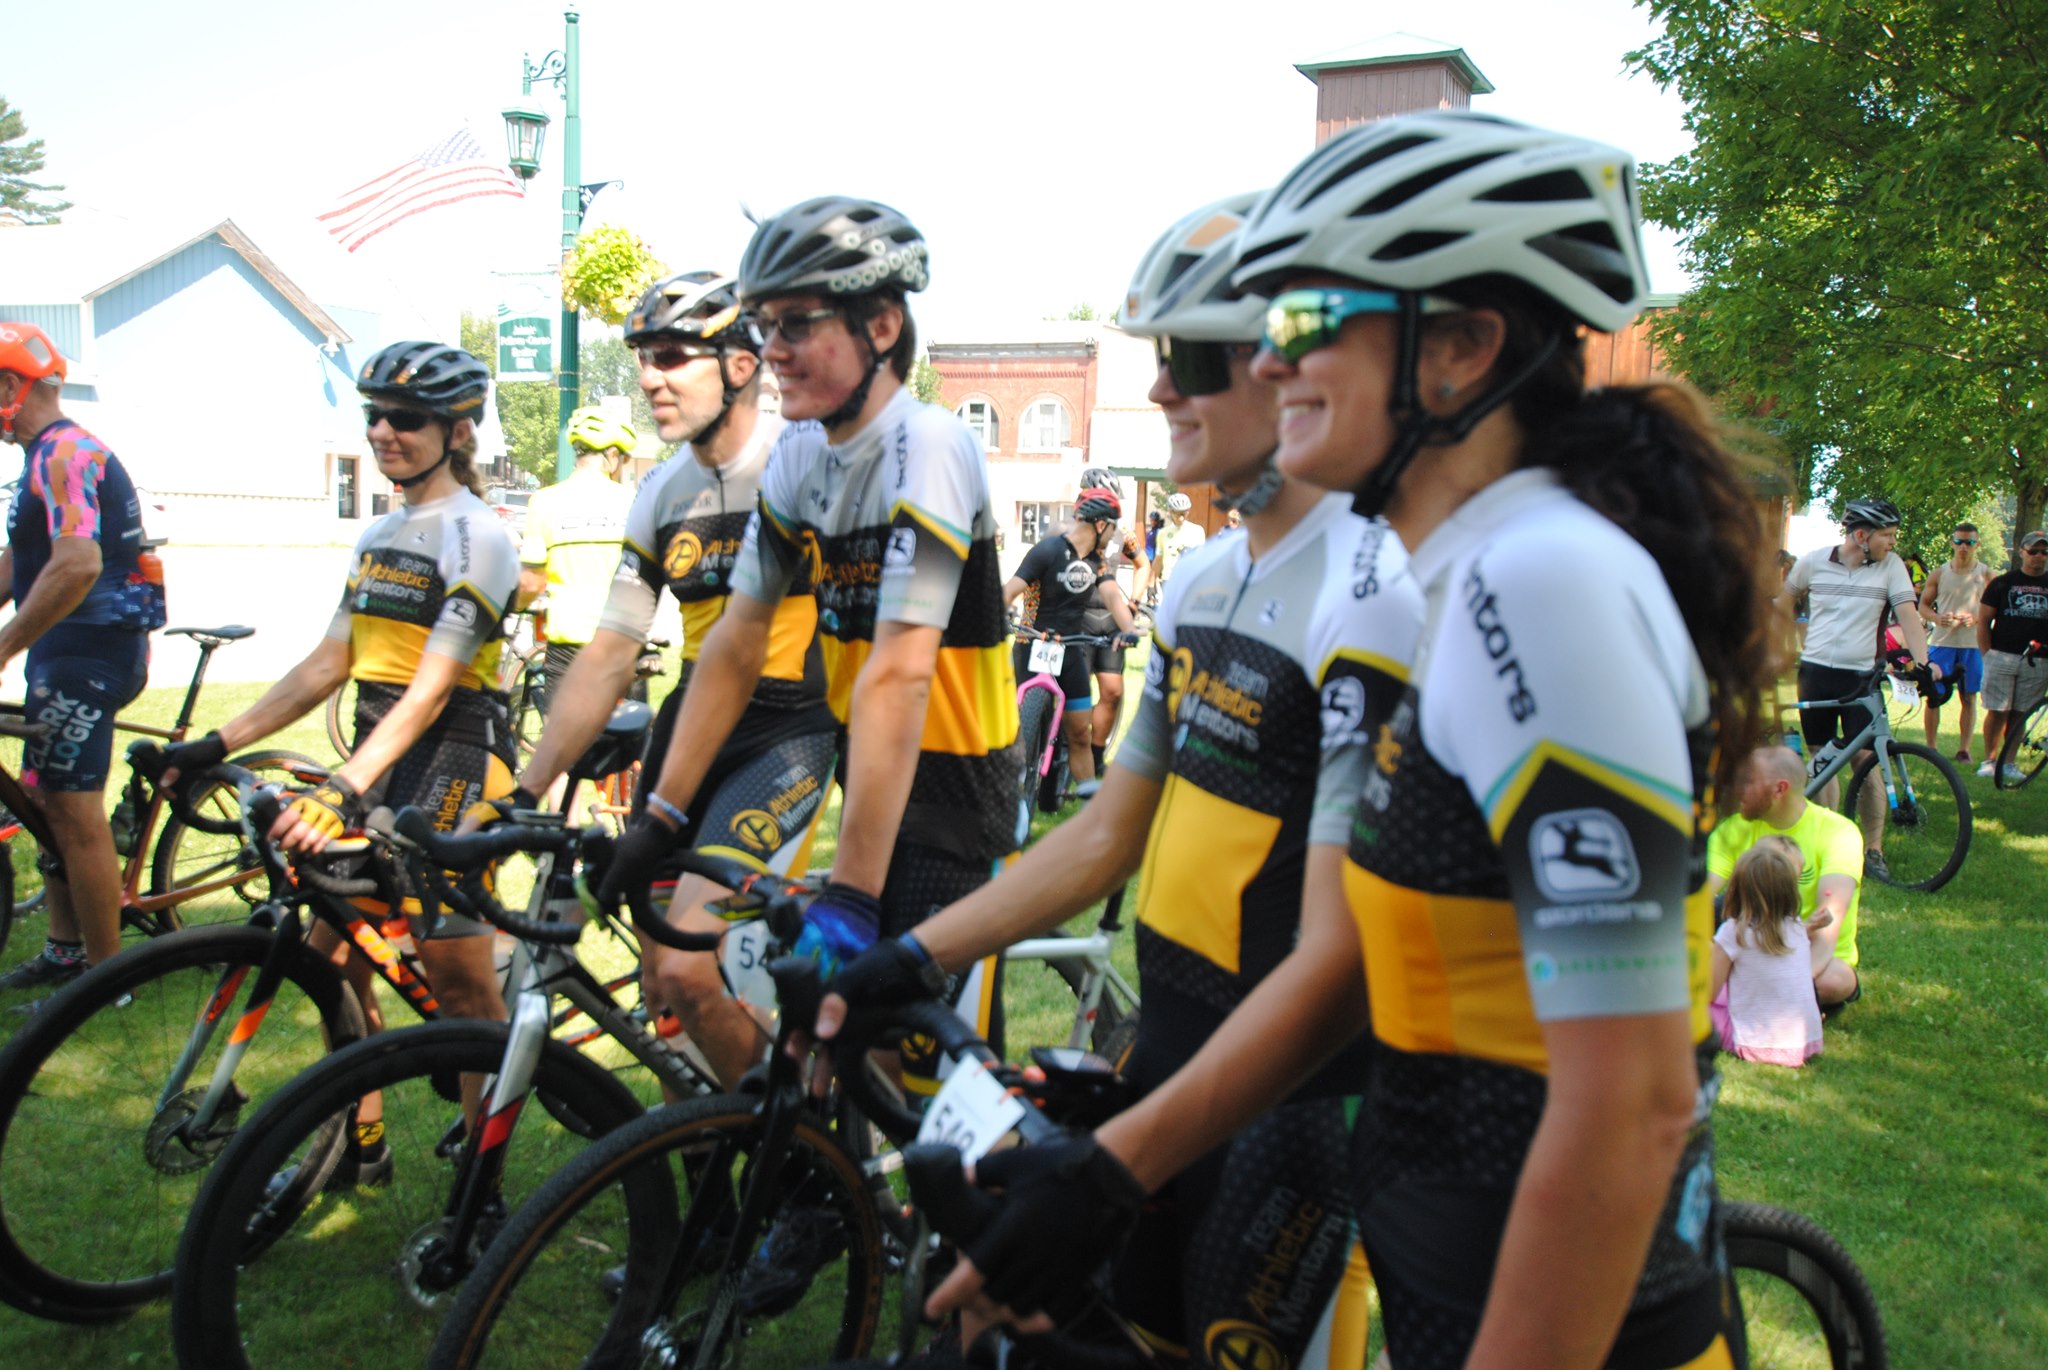
The morning of Barry had arrived, and I was indecisive on whether to wear a wind vest or only a jersey at the start line. On my warmup I opted for the jersey, additionally, I almost ran over a large raccoon. It was then 6:40AM, and the lights of about 243 riders could be seen on the streets of Hastings. If you know someone who is crazy enough to enjoy 100+ mile gravel rides, they were likely there on that October 10th morning.

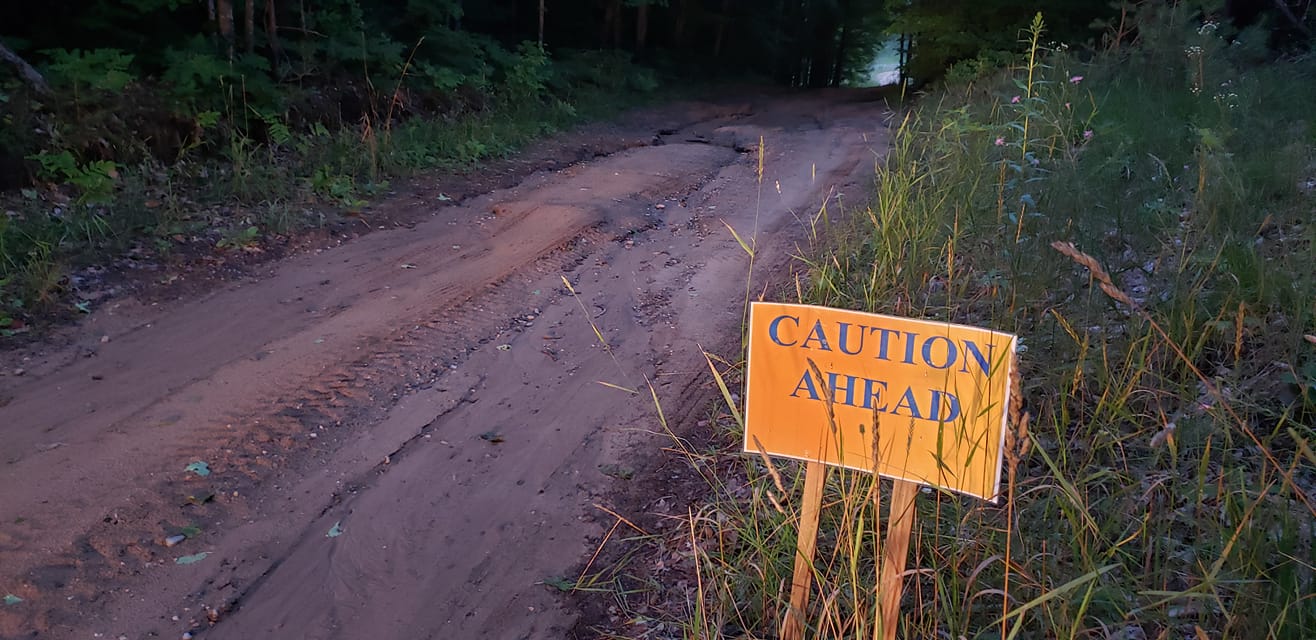
While hilly, the beginning 35 miles remained tame, and were a prologue for the rest of the ride. Occasionally a hard effort was put in by riders at the front, but for the most part, a peloton of 50 or so remained together until we reached the first seasonal road. I didn’t get a chance to ride it, but I did walk through some of the portions of Two-Track and had an idea of what I was getting into.

Nearing the 35-mile mark, racers at the front of our group pushed the pace and I positioned myself in the top 10 leading into the first two-track. As predicted, we made a left onto Solomon Rd. and things went from Chiller to Psycho Killer. Everyone was riding/running up the sandy climbs and it went from a group ride to everyone for themselves at that point. A break of 5 riders occurred and I was 7th exiting this the first section of two-track. The next 10 miles or so were on and off seasonal road, and for a while I could still see the lead group off in the distance. Eventually, I caught up with Nicholas Stanko and we rode together in intervals. By intervals I mean he would get ahead on some sections, and I would catch up on others. The lead group eventually faded off into legend as we continued the ride.

Near Middleville, we were treated to 5 miles of ultra-smooth pavement, and only hit one red light while getting through town. At mile 47, Nick looked back and asked, “You think we can catch them?”. I, who was already having a hard time in his draft, replied, “I’m just going to see how long I can hang on,”. Not long after that, Tim Mitchell soloed up to us in aero position, setting a harder pace. I promptly fell off the duo, I had been pushing myself hard and knew that the last 18 miles were going to leave a mark. Looking back, there was no one as far as I could see. Consequently, I got back into a groove and rode solo. Mile 48, more seasonal road arrived, Tim and Nick were back in sight. Again, at certain portions of these roads, I would begin to catch up and in others, I would fall behind.

At mile 60, we hit the infamous Sager Rd. No, I’m not talking about the normal edition of Sager Rd. This is the Big Papa to the normal portion of Sager. More sand, more climbing, and more descending. At the end of the “road”, two huge, unavoidable mud puddles lay before me. I must thank Nick Dehaan for pointing out that you can run alongside the first puddle. I’m well-versed in drivetrain issues so I figured it was a better option to walk the first puddle and run through the second.

Returning to classic Barry gravel, I was now very much solo. At mile 65, I had to stop at the Otis Lake aid station. The plan was to bring enough water to not stop. However, one of my three water bottles shot off my bike frame on the first two-track, and the water bladder in backpack had questionable motives. By that I mean it was leaking onto my right leg the entire time. Keegan pointed out at the end of the race that it looked like I had either crashed or was having an allergic reaction (I had been drinking red Gatorade). Some of the kind volunteers topped me off with fluids and I also grabbed a few Clif Bloks shots. Exiting the aid station, Keegan Korienek and Scott Quiring caught me. We were then a trio, and with no seasonal road between us and the finish, it was full gas for the remaining 40 miles.

If I had to guess, I would say that it was about mile 70 when Benjamin Meer and Adam Hockley caught up to us. Unfortunately, not long after this, Adam had a flat rear tire and stopped for repairs, so we were then a group of four. With 30 miles to go, I was at the edge of my limits. On the turns, I had to push hard to stay with the group and when it came time to take a pull, my legs didn’t want to obey. The thought repeatedly crossed my mind that I should just let the group go and ride my own pace. However, while things seemed to be deteriorating, I affirmed that come hell or high water I would finish with the group.

With about 25 miles remaining, we found Nick Stanko, who informed us that there were 6 riders ahead. There were 5 cyclists in the group, someone would not be on the podium in a few hours. The following 20 miles were a lot more hills and as crazy as it might sound, I felt myself recovering a bit after 95 miles in the saddle.

Keegan, Scott, and I had a promise that no games would be played till the last 5 miles. We all kept to that promise.

3 miles to go: Ben made a small break on a flat section of gravel. Nick soon followed his wheel. Scott put in an effort to try and catch the pair. In the previous two miles, I felt cramps coming on and knew my legs were toast. I came around Scott to try and close the gap between us and the pair.

2 miles to go: Try as I might, I couldn’t bring them back and as we began descending the last gravel hill and onto the pavement, Scott came around me and I hopped on in his wheel. The order was then: Nick, Ben, Scott, Me, and Keegan. On pavement, we motored down a long descent to catch Nick and Ben. Scott was unable to close the gap, and the other two were just a few bike lengths ahead. I came around and Keegan was the one to finally seal the deal and close the gap. At that point we made our last right hand turn onto more pavement.

1 mile to go: I felt myself slipping from the group, someone from the Thriller rode up next to me saying, “Come on let’s get ’em big guy!”. That was all the motivation I needed.

This was it. The culmination of 104 miles of Gravel, Two-Track, Pavement, Grit, and Some Luck. We were in the home stretch. The group was silent now and the only noises besides cheering spectators were bike chains running over gears and rubber on pavement. Off in the distance, the sound of music and the announcer slowly drew closer.

??? miles to go: I was riding in the drops behind Scott, at the tail end of the group, as the countdown to the final sprint ticked away. The order of the group was Nick, Ben, Keegan, Scott, and Myself. I Can’t remember who it was that started the sprint but when the dust had finally settled, the order was: Keegan, Nick, Ben, Scott, and Myself.

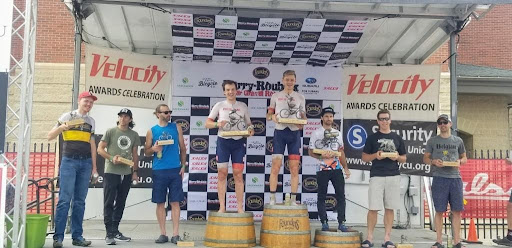
Not sure how it happened, but I had taken 10th place. Maybe because Scott had crossed the starting mat before me and I had then caught up to him, but was the last one over the finish line of our group. Either way, I was absolutely floored to be able to finish the ride the group.


The Divide – Gravel Road Race

August 24th, 2021 by JoAnn Cranson

By:  Christina Vipond

The Divide began in 2015 by Jeff Harding and Don Passenger as a fundraiser for Manton Public School’s Cross Country and track teams. It is held the last Sunday of July and is part of the Michigan Gravel Road Series.  

The Divide offers something for all gravel enthusiasts with 3 route options:

  • 19 miles with 1330 feet of elevation change
  • 34 miles with 1987 feet of elevation change
  • 50 miles with 2292 feet of elevation change.

There is an outer loop that the 34 mile course completes one time and the 50 mile racers get to experience it twice. The outer lap is ridden in opposite directions every year to vary the terrain profile. All routes begin and end on paved roads in Manton, Michigan. Around the 3 mile mark, these roads turn to mostly hard packed gravel with “a little two-track” and “a little sand”  for a scenic ride on the outskirts of the Manistee National Forest.

The Divide is a great race for gravel, mountain and fat tire bikes. As with so many other races, The Divide will leave racers wondering if they are riding the right size tire for the course. 

Jeff, Don and their volunteers (including the cross country and track teams) were top notch with ice cold drinks and freeze pops at all aid stations. The course was well marked with signs and volunteers were stationed throughout the course to make sure racers stayed on course. Photographers volunteered their time and posted over 1000 photos that racers could share for free. 

This year’s race took place on Sunday, July 25th. Jeff and Don, as always, did a great job of posting on The Divide’s Facebook to keep racers up to date. A post on July 22nd, updated the course conditions.  It was reported that the roads were recently brined and the outer loop was rolling “faster than ever”. Then the news about the infamous Gilbert Corners, a section of sandy two-track that keeps racers guessing about their bike choice.  The 19 milers could expect some sand at the bottom of the downhills. The 34 milers would ride this 3-4 mile section mostly uphill on their way back into town. The 50 milers would get to ride this section both out and back. There will be some “sketchy downhills” on the way out and “on the way back the sand at the bottom of those downhills will zap your legs before the punchy uphills challenge your will power”. There was a July 24th update post reporting the rain had made the washouts on Gilbert Corners a little bigger. “Caution Ahead” signs were put out throughout the course with a Facebook posted warning “when you see a caution sign, we mean it!”


Athletic Mentors represented well in the race with athletes using a variety of tire sizes.

  • Jared Dunham took 3rd overall in the 50 mile race. He rode 42cc but felt he would have been fine on 40cc tires. Jared said he feels like the sand made a few of the hills more challenging but you don’t need a big tire to ride the course. He further stated that “The Divide may be 50 miles but it’s probably the most memorable 50 mile race course I’ve done so far.” He thought it was a good race, very hilly with some sand thrown in.
  • Terry Ritter took top spot in the 50+ class for the 50 mile on 36cc tires. He felt the course conditions were excellent; right direction and plenty of heavy rain the day before.
  • Hunter Post took 1st in his age group and 4th overall in the 50 mile race, racing 40 cc tires. He also felt the rain helped firm up the sand, but the depth was still energy draining. Particularly on the 2nd lap, once the sand was chewed up by other riders. Hunter liked the direction of this year’s outer loop as well.
  • Melanie Post took 1st in her age group for the 34 mile race. Melanie  raced on 40 cc tires and stated she also liked the route this year. “The sandy climbs were definitely the most challenging part of the course, aside from just the elevation gain in general. The course was very well marked with great volunteers as always.”
  • I raced the 50 mile route on 36cc tires and finished 2nd overall for women. Choosing lines on the edge of the two-tracks was helpful but I still did my fair share of walking some of the deeper sand. The main gravel roads were in great condition.

The Divide really does have something for everyone with 3 options for miles, challenging climbs, fun and memorable sections of sand, and beautiful scenery on quiet gravel roads. It is a great fundraiser with all proceeds going to Manton’s cross country and track teams.  Hope to see YOU there next year!!


Garmin MTB Power Pedals – Rally XC100

April 4th, 2021 by JoAnn Cranson

By:  Collin Snyder

These days, there are countless products out there to measure power. Each type has their own pluses and minuses. Pedal based powermeters have become more and more common over the past five years, although has been mainly targeted towards road bikes. This year, the German company SRM and Garmin have brought this technology to mountain bikes, both using a Shimano SPD style XC pedal. The big benefit of a pedal based system vs a crank based system is it is very easy to swap from bike to bike. With two mountain bikes, a fat bike, and several cyclocross bikes, this benefit is very enticing for me. Earlier this week, I was able to purchase a single sided version of the Garmin XC mountain pedals known as the Rally XC100

Here is my initial review

First, pairing was without issue using a Wahoo head unit. It quickly found the ANT signal, and once it was detected, I was able to change the crank length which defaults to 172.5mm. If your cranks are any other length, this must be changed for accurate power numbers. The instructions right out of the box are a little thin as they are mainly just pictorial based. It didn’t give great instructions on how to calibrate. Stages requires the crank to be at 6 o’clock, other powermeters just need the cranks to be still, and older powertaps had to have the cranks spin backwards during the calibration. Googling calibrating the older Garmin Vectors came up saying just calibrate when nothing is touching it. Hitting calibrate the first time, it just kept giving the “calibrating” message for about 30 seconds followed by calibration failed. I hit retry and it calibrated almost instantly, said torque offset 0.0.

Power side with LED indicators

Right out the driveway/down my dirt road, the numbers seemed inflated quite a bit. The numbers were right around my threshold power which normally I can’t hold until I warm up for a little bit. Fast forward a few minutes and I got stuck at a light. When the light turned green, I did a hard acceleration which was easier than an all-out sprint, my power was in excess of 1000 watts…which unless every other powermeter I’ve owned has been lying to me, wasn’t right.

Adjustable release force

However, after about 5-10 minutes, the numbers seemed to settle down and were much more believable. The rest of the ride was uneventful. I rode about a 50/50 mix of road and trail. Anyone expecting useful info on a twisty single-track, will be disappointed. Like the mtb powertap and older stages I’ve owned in the past, numbers on the trail are either 500-700 watts or zero. When you get done and look at your average power for a really hard lap, you will surely be underwhelmed. Your average power will probably be only 60-75% of what you could hold on the road for the equivalent time. Power on the mountain bike is really for all that time spent riding to and from the trail unless you are somewhere that has long sustained climbs or long open stretches.

After the ride, one notable oddity was the max power for the ride was severely inflated. It said my max power was around 1300 watts, about 300-400 higher than I will see in an all-out sprint. Comparing my power/time graph, the 1-2 second power was the only thing that was out of whack compared to historical data.

Ride two was a little more mundane. I recalibrated before the ride. Again, it failed calibration the first time, but when I clicked retry, it gave a successful message. Out the door, power numbers appeared normal/believable. I rode the 4-5 miles to the trail head, did a hot lap of my local trail, and rode home. Once again, my max power was super high at 1500ish watts. I suspect that a single rouge spike is causing the issue. Your 1 second power is a worthless figure, so I am not concerned over these spikes. If the main numbers stay inline, then I am not worried.

The Garmin Rally XC100 are available now from your local bike shop for an MSRP of $699. For dual sided power, the XC200 are available for $1200.

Special thanks to Sweetbikes in Canton Michigan. In these times, support your Local bike shop.


Night Riding Tips

October 2nd, 2020 by JoAnn Cranson

By Ross DiFalco

As the days get shorter and cooler, you might find yourself coming home from work in the dark without the ability to ride outside. Instead of relegating yourself to the indoor trainer, you do have another option. You can learn to ride in the dark. For the uninitiated, riding in the dark may sound crazy and scary, but it doesn’t have to be.

Where to start

You will need a good set of lights. I recommend getting a helmet mounted headlight with an external battery. If you have a spare helmet, I find it beneficial to keep the light mounted so it’s one less hurdle. Get one with greater than 1000 lumens that can run for a minimum of two hours. When you test a light, it might seem bright, but while you are riding it will seem much less so. Brighter is better, with a long beam distance being very important. You also should have a backup light on your handlebar for a “just in case” moment. There should be two rear facing lights as well. I like a very bright seat post strobe light and a helmet strobe light. The name of the game is being seen and being able to see.

Once you have your lights and have charged them, it’s time to select your bike. If you are like many cyclists, you probably have a bike for every niche around. For night riding I highly recommend using a mountain bike. Having flat wide handlebars, an upright riding position and wide tires/suspension all act as a pothole security policy. Potholes sneak up on you and it would be bad to crash in the middle of the night. If in case you do crash, ride with your phone charged. Before you head out the door, tell someone where you are going and how long you will be gone.

Let’s get riding!

Choose a route that has minimal traffic, and preferably slow traffic. I really like riding through neighborhoods, dirt roads, paths, and rail to trails. I avoid riding on sidewalks and roads with minimal shoulders. It’s very similar to riding in the light, those areas tend to pose the greatest risk to cyclists. Do be aware that a bright helmet mounted light can blind drivers so be cognizant of where you look. Another word of caution, deer are much more active at dawn and dusk. Watch out for deer that might hop out in front of you.

Take it slow, get used to the feeling of riding in the dark, and enjoy the differences. I am a cyclist that loves to get outside and be in nature. If I can ride longer outside and avoid my trainer, I will gladly do so. If you are like me, give riding in the dark a try! It’s an exciting feeling to glide through the night in the chilly fall air.


Recovering from Burnout in Cycling

May 1st, 2020 by JoAnn Cranson

By:  Jared Dunham

There are some workouts that we don’t want to finish or even start, however when this happens more often than not, it may be clear that you’re suffering from burnout or overtraining. Burnout is especially detrimental to training because it is not something like sickness where resting for a few days or taking medication can fix, it’s something that must be mentally worked through and has no quick fixe. It’s not a matter of lacking the strength or endurance to finish a workout but instead the motivation, which can be much worse. Personally, I’ve had fleeting experiences with burnout but none to the degree I experienced near the end of this past off-season. That being said, here are some things I learned recovering from overtraining.

Diversify: My first suggestion, especially during the winter months, would be to find multiple forms of exercise. Indoor cycling can remain the primary concern but doing another sport that cross-trains well is incredibly beneficial when biking-in-place gets mentally taxing. All my time spent training this past season revolved around two options; strength/weight workouts and indoor cycling. I did two strength workouts per week and six cycling. The issue was a lack of variety. Therefore, strength training had always seemed like a breath of fresh air to me each week. When I initially “cracked” there weren’t other forms of exercise to fall back on. Even if you don’t do these sports on a regular basis having them in your armory will be beneficial to keep your training on tract when you get sick of indoor cycling. Some sports/disciplines that would be beneficial are: cross-country skiing and fatbiking (if you have the trails), indoor track cycling (if you’ve got the track), weight lifting/strength training, snowshoeing, running, or swimming. Other activities that will at least get you outside would be: downhill skiing/snowboarding or snowmobiling.

Reach Out: If you are being coached make sure you’re in communication with them about the situation and express honestly what your feeling currently. If you’re self-coached then talking to a racer in your cycling community who has a few years of experience may help. Other than a coach or veteran cyclist, talking or spending time with family or friends can also improve the situation and allow you to chillout. After reaching out to my coach and explaining the situation we decided to switch a lot of my training to fatbiking as base miles near the end of the offseason.

Baby Steps: In order to fully return to the bike it may take time. Having another sport to stay active with will help, but for a good recovery, you may also need to reduce your time spent training per week or your training volume. If you’ve got time sensitive goals that you’re working towards then this concept may seem especially difficult, but I would recommend not taking huge leaps and bounds during this period. Continue working on your goals while you’re working through this and don’t beat yourself up over not getting to a specific FTP or weight by a certain date. Making these goals flexible will allow you to stay more optimistic while recovering. Something that helped me was looking at each day and seeing how I was improving or following my training plan. Each time I finished my stretching routine or stuck to my nutrition plan it was a good day.

Relax: Possibly the most important piece to this process is to chill out. This situation will pass and won’t ruin your entire race season. Make sure to take some time and get the occasional RnR by doing another hobby, spending time with yourself or others, or whatever it is that you enjoy doing (off the bike). One of the issues with my recovery was that I was overthinking the issue. I’m a pretty big numbers person and they weren’t aligning the way I wanted them to for a few weeks. Sometimes you just need to take a step back and look at the big picture.

So to bring it all together, here are the things I would recommend getting around to sooner or later so that when you hit a phase of burnout you’ll be able to shrug it off faster:

  • Find other hobbies you enjoy
  • Find other sports that cross-train well (especially for winter)
  • Invest in things that will make indoor riding more comfortable/easier (a new fan, Zwift, more towels, a better saddle, etc…)
  • Take note when the workouts start to become mentally harder to complete. In my experience by the time I realized I was in a rut, it was already too late.
  • Understand that every workout isn’t life or death. You can occasionally take it easy  if you are very sore or mentally taxed.

Better Sleep for Better Results

March 5th, 2020 by JoAnn Cranson

By  Jared Dunham

Recovery between workouts is crucial for improving your ability to perform in endurance sports. Proper recovery helps in many ways, some of which are:

  • Allowing your muscles to rebuild and recover from a hard workout.
  • Preventing over-training or burnout.
  • Managing consistent weight and body composition.

There are many ways to receive the right amount of recovery between workouts, popular methods are: protein intake, stretching, foam rolling, and time spent away from the sport. While all of these are important factors to consider, one thing that can be overlooked or set as a lower priority is the amount and quality of sleep you’re receiving. Those restful night hours are crucial because it can directly affect how hard you perceive a workout is. “That means biomechanically there’s no reason sleep will lessen your physical capabilities, but you will fatigue faster on less sleep, making it feel tougher to work out to your maximum capacity,” (How sleep affects fitness and vice versa: Everyday Health). This being said, here are my recommendations for getting the proper amount of sleep needed to recover best.

Get the right number of hours. The recommended number of hours would be eight per night, however with a busy schedule this can be difficult. Something I find that helps is scheduling my less crucial tasks near bedtime, that way the task I skipped to get asleep on time isn’t a big deal anyway. To really soak up those hours, create a sleep routine where you arrive and depart from the mattress at the same times every day. This will make getting to bed and waking up on time easier as your body acclimates to the schedule.

Improve your digestive system. An unhealthy gut can lead to poor sleep and poor sleep can lead to an unhealthy gut, it’s a vicious cycle. In my experience, three major contributors to a problematic stomach are: lack of variety in diet, lack of fiber in diet, or a calorie deficit. If you’re eating the same things every day then diversifying the food groups your consuming will draw more nutrients from your diet, which can aid gut health. Fiber is also an important factor, though it can sometimes seem difficult to take enough in while dieting. The average recommended amount is 35 Grams per day which I’ve found to work fine with me. Two foods that are low calorie and packed with fiber are Spinach and Berries. On another note, natural fiber is leagues better than supplementing it out of a bottle. Lastly, a diet that has you eating too little calories will slow down your metabolism and hurt not only weight loss but also sleep. Going to bed a tad hungry is okay but trying to sleep while you clearly did not eat enough is going to make easy rest a distant dream.

Remove distractions before bed. Generally one of the rules for getting good sleep is to shut down electronics prior to hitting the hay, however I think we may need to be broader than that. We should stop focusing intently on one thing in that 30 minute window before bed. I say this because concentrating on a task and then attempting to sleep could leave you with ruminating thoughts that keep you awake. Good examples of tasks not to do would be: playing an intense video game, doing stressful paper work, or watching a horror movie.

Stretching or Foam Rolling. Two things that have aided me in the transition from wake to sleep is stretching or using a foam roller immediately before bed. While there aren’t certain stretches or areas of the body to roll that I recommend everyone, if you’re a cyclist then obviously to get the best recovery from a workout stretch and roll your lower body.

Without the proper recovery and sleep, it doesn’t matter how hard you workout you will not yield the results to meet your goals.


My Oatmeal Cookbook

February 9th, 2020 by JoAnn Cranson

By Jared Dunham

As an endurance athlete you may be faced with many early morning or otherwise inconveniently timed workouts to your daily schedule. To fuel for one of said workouts it’s easy to reach for a protein bar, cereal or a similar product, however a better and more holistic option is oatmeal. Oatmeal is an empty canvas as far as food goes, it can be served in many ways and variations. Admittedly I’m an emerging oat addict myself, eating mostly oatmeal for a great deal of my past breakfasts. Nowadays I don’t eat oats nearly as much as I did in the past but still thoroughly enjoy the dish every now and again. With that being said, here are some of my favorite recipes for oatmeal. I hope they help break you out of your daily oat rut or make you take a shot in the dark and try some oats for the first time.

Quick Notes:

  • These oat recipes can be made easily in 15 minutes or less with the caveat that you use a microwave for cooking.
  • Most microwaves have an “Oatmeal’ setting on them, however cooking them for about 3 minutes is a good substitute.
  • Boiling oatmeal on the stove in a cooking pot also works, however this requires a little more time and cleanup, so I usually opt for the microwave if I’m trying to whip up some oats quickly.
  • All my recipes are based on one serving and are a ½ cup of dry oats each.
  • When cooking these oats, I use about ¾ cup of water.
  • Milk is a good substitute, which some of the recipes call for, but I use water most of the time.
  • Lastly, the amounts of ingredients in these recipes are in the eye of the beholder and all these meals are open to editing so if there’s something you wanted to change then go ahead and try it.

Classic Recipes

Pumpkin Spice

While the season for pumpkin spice lattes may be over, you can still enjoy this meal anytime.

Ingredients: Estimated Nutrition Facts:

  • ½ Cup Oats Calories: 268
  • 1/2 tsp Pumpkin Spice Carbs: 38.5g
  • 1/8 Cup Pecans Fat: 10.3g
  • 1/4 Cup Canned Pumpkin Protein: 8g
  • ½ tbsp Brown Sugar

Directions:

  1. Begin cooking oats, about halfway through mix the canned pumpkin in with the water and oats.
  2. Finish cooking.
  3. Mix in brown sugar to be sure it melts while oats are hot. Afterwards stir in other ingredients and enjoy.

Cinnamon Apple

Cinnamon apple is a very simple recipe that is a good option if you are trying to fuel for a workout or day without many bells or whistles attached.

Ingredients: Estimated Nutrition Facts:

  • ½ Cup Oats Calories: 204
  • ½ Finely Chopped Apple Carbs: 41.7g
  • 1 tsp Cinnamon Fat:3.2g

Protein:6.3g

Directions:

  1. Chop up half an apple while aats cook.
  2. When oats finish mix in Cinnamon and Apple.

Cooking Notes: If you’re looking to sweeten up this recipe then add half a tablespoon of brown sugar or maple syrup.

Maple Nut

This recipe was crafted to mimic the taste of the “Maple Nut” glazing that coats a doughnut of the same name. The main difference is this one speeds you up instead of slowing you down.

Ingredients: Estimated Nutrition Facts:

  • ½ Cup Oats Calories: 300
  • 1 tbsp Natural Peanut Butter Carbs: 45.1g
  • 1 tbsp Real Maple Syrup Fat:11g
  • 1 tsp Vanilla Extract Protein:9.5g

Directions:

  1. Cook oats, then mix all ingredients.

Carb Load

Sweet Potato Oats

Sweet potatoes and oatmeal can be a match made in heaven especially if you’re looking to pack in a few extra all-natural carbs before a ride. This bowl combines the two with a dash of sweetness and salt.

Ingredients: Estimated Nutrition Facts:

  • ½ Cup Oats Calories: 321
  • 1/2 Sweet Potato Carbs: 52g
  • 1 tbsp Brown Sugar Fat: 10g
  • 1/8 Cup Chopped Pecans Protein: 7g

Directions:

  1. Chop up the Sweet Potato while Oats cook.
  2. Stir in Brown Sugar to melt after Oats finish.
  3. Cook Sweet Potato in microwave if you need to.
  4. Mash Potato in with Oats until desired texture is achieved.
  5. Mix in Pecans.

Cooking Notes: The fastest way to make this recipe is to microwave the potato however, if you steam it, that will allow the spud to mix better with the oats. If you’re looking for more carbs add the whole potato.

The Fruit Bowl

Let’s see how many different fruits we can mix in with oatmeal. This is less of a standout than some of the other recipes but still holds true with how great oats taste when your average fruits are mixed in.

Ingredients: Estimated Nutrition Facts:

  • ½ Cup Oats Calories: 259
  • ½ tbsp Honey Carbs: 55g
  • 1 Sliced Strawberry Fat:3.3g
  • 1 Sliced Orange Wedge Protein:7g
  • 1/4 Chopped Apple
  • 1/4 Sliced Banana
  • 6 Grapes

Directions:

  1. If Fruit isn’t already prechopped then do that while Oats cook.
  2. Mix Honey followed by Fruit when Oats are finished.

Cooking Notes: This recipe requires various fruits, but you can use whatever may be at your disposal. If there’s any leftover fruit salad, simply use that or chop up fruit to be used for several servings and then store in the refrigerator.

Beet Oatmeal

Studies have shown that beets can help improve performance in endurance sports when consumed before exercise. It only makes sense that we add them in with oats.

Ingredients: Estimated Nutrition Facts:

  • ½ Cup Oats Calories: 260
  • ¾ Cup Beet Juice Carbs: 54.4g
  • 1/2 Finely Chopped Apple Fat: 3.2g
  • ½ tsp Cinnamon Protein: 6.4g
  • ½ tsp Vanilla
  • 1 tbsp Brown Sugar

Directions:

  1. Add Beet Juice instead of Water to Oatmeal for cooking.
  2. Chop Apple while Oats cook.
  3. Once Oats are finished, mix in: Cinnamon, Vanilla, Brown Sugar and Apple.

Cooking Notes: Unless you have a juicer or direct access to beet juice then mixing dried beet powder in with water will be your best option. That is what I do here.

Protein Packed

Greek Oats and Berries

For this recipe the Greek Yogurt provides a nice contrast to the citrus flavor of the mixed fruit.

Ingredients: Estimated Nutrition Facts:

  • ½ Cup Oats Calories: 210 to 235
  • ½ Cup Frozen Mixed Berries Carbs: 38 to 40g
  • ¼ to ½ Cup Greek Yogurt Fat: 3g

Protein: 10 to 15g

Directions:

  1. Cook Oats.
  2. Cook Berries separately.
  3. Mix warmed Fruit with Oats and Greek yogurt.

Cooking Notes: I prefer to leave the fruit juice that comes with the frozen fruit in when I mix with oats.

Strawberry Dream

I was a little hesitant on mixing cottage cheese in with oatmeal but soon discovered that the pair have a similar flavor that jives perfectly.

Ingredients: Estimated Nutrition Facts:

  • ½ Cup Oats Calories: 279 to 334
  • 6 Chopped Strawberries Carbs: 48 to 50g
  • ¼ to ½ Cup Cottage Cheese Fat: 5 to 8g
  • 1tbsp Strawberry Jam Protein: 8 to 17g

Directions:

  1. Chop Strawberries while Oats cook.
  2. After Oats are ready; mix in Cottage Cheese and Strawberry Jam.
  3. Lastly, add Strawberries.

Cooking Notes: This recipe can be adapted to any fruit, EX: Chopped Peaches and Peach Jam.

Savory Oat Bowl

Here’s another one you may have to be open minded about. Trust me though, there’s nothing under the sun that doesn’t taste great with bacon and cheese.

Ingredients: Estimated Nutrition Facts:

  • ½ Cup Oats Calories: 361
  • 2 Eggs (Runny) Carbs: 28g
  • 1 Crumbled Slice of Cooked Bacon Fat: 18.3g
  • 1 tbsp Shredded Cheddar Cheese Protein: 22.8g
  • Salt and Pepper to taste

Directions:

  1. Fry Eggs while Oats cook.
  2. Mix Cheddar Cheese in with oats after they’re finished.
  3. Add Bacon to mixture.
  4. Mix in Salt and Pepper to taste, then top with Runny Eggs.

Cooking notes: I prefer using runny eggs for this recipe because the yoke adds more flavor to the bowl, however I have tried mixing scrambled in with oats. Something I haven’t tried is mixing precooked oats in with scrambled eggs as they cook. If you want to make this recipe much faster with less cleanup make sure to pre-fry your bacon and then simply store in the fridge till you need to use it, then microwave to warmup for this recipe.

Indulgent Recipes

Elephant Ear

As the name would suggest, the main objective of this recipe was to have a similar taste with that of an Elephant Ear. This one is surprisingly low calorie compared to a lot of the other recipes that made it onto the “Indulgent” list.

Ingredients: Estimated Nutrition Facts:

  • ½ Cup Oats Calories: 271
  • 1 tbsp Sugar Carbs: 32G
  • ½ tbsp Cinnamon Fat: 14.5G
  • 1 tbsp Melted Butter Protein: 5G

Directions:

  1. Begin cooking Oats
  2. Near the end of their prep add Butter to be melted.
  3. Mix Butter in with Oats and add other ingredients.

Almond Joy

We’re going for an Almond Joy candy bar here, enough said.

Ingredients: Estimated Nutrition Facts:

  • ½ Cup Oats Calories: 577
  • 1/8 Cup Sweetened Coconut Flakes Carbs: 64.6g
  • 1/8 Cup Chocolate Chips Fat: 31g
  • 1/2 Cup Whole Milk Protein: 18.6g
  • 1/8 Cup Sliced Almonds

Directions:

  1. Cook Oats with Milk instead of Water.
  2. After Oats have finished mix in Chocolate Chips till they melt, followed by other ingredients.

Cooking Notes: Obviously if you’re looking for a leaner version of this recipe it can be done. I’d recommend replacing Whole Milk with Almond and lessening the rest of the ingredients.

PB&J

Here’s an idea to shakeup that average, packed lunch, peanut butter and jelly sandwich.

Ingredients: Estimated Nutrition Facts:

  • ½ Cup Oats Calories: 397
  • 1 tbsp Natural Peanut Butter Carbs: 49g
  • 1 tbsp Natural Jelly Fat: 17g
  • 1/2 Cup Whole Milk Protein: 15.3g

Directions:

  1. Cook Milk with Oats instead of Water.
  2. After Oats have finished mix in other ingredients.

Cooking Notes: If you’re looking to save a few calories, skimp out on the Whole Milk and replace it with Almond or Skim.

The Usual

The Usual was probably my favorite recipe for quite some time, it capitalizes on the banana and peanut butter combination that works so well with oatmeal. A note however, this recipe has a lot of horsepower so you may want to save this one for a hard workout or race.

Ingredients: Estimated Nutrition Facts:

  • ½ Cup Oats Calories: 436
  • 1 tbsp Natural Peanut Butter Carbs: 64.5g
  • 1 tbsp Sliced Almonds or Other Nuts Fat: 15.3g
  • 1 tbsp Natural Maple Syrup Protein: 11.6g
  • 1 tsp Cinnamon
  • 1 tsp Vanilla Extract
  • 1/2 Chopped Banana

Directions:

  1. Slice up your Banana while Oats cook.
  2. When Oats are finished mix ingredients in as followed: Maple Syrup, Vanilla Extract, Cinnamon, Natural Peanut Butter, Sliced Almonds, and Banana.

Enjoy your Oats!!


How “Destiny” Brought Me to Racing

November 7th, 2019 by JoAnn Cranson

By:  Joe Bianchini

My first experience on a longer bike ride of sorts was in 2014, after I had just graduated college. My girlfriend at the time and now wife, had just received a road bike for her birthday and was eager to try it out. We were staying at her parent’s cottage near Bellaire, MI and had spent a lot of time meticulously plotting out how far we were going to go, what speed we wanted to maintain, what clothes to wear and most importantly how long we could afford to stay at The Dockside, a local bar on Torch Lake. When I say afford, I mean both how many beers we could literally afford having just graduated college and how much time we could afford before it got too dark out for our 15-mile return trip. These were the important things at the time that I needed to know before embarking on a ride over 5 miles of flat roads yet alone the 30 miles of rolling hills that we were about to do.

We ended up making it back okay but with about 3 miles left, we had one last climb to the top of a hill before this venture would come to an end. It was a twisty turny climb that I always thought people were crazy for biking up as I rolled past them in my car countless times. Now here I was doing it with a greasy hamburger and several beers sloshing around in my stomach. The biggest challenge however was the fact that I was on a hand me down children’s sized mountain bike from the 1990’s that had “Destiny” emblazoned across the top tube. Prior to getting to the climb, Brooke had very generously offered to ride “Destiny” up the hill and let me ride her bike. Despite the bike being heavy, too small and this being one of the steepest hills around; I was not going to let this challenge defeat me. Eventually, and not in quick fashion I made it to the top, but more importantly I had made up my mind about getting a road bike. 

I grew up playing a variety of sports including football, lacrosse, wrestling and rugby but I never had participated in sports that were more endurance related such as biking, track, cross country, etc. However, the last time I ever participated in any competitive sport was high school. Having that brief period where my mind switched over into that competitive mindset on that hill was so exhilarating and I was hooked. It was such a fulfilling experience to not think about anything else that was going on in my life and only focus on getting to the top of that hill. Although I am sure that I could climb that same hill much faster today, the fact of the matter is that my attitude was the same then as it is now: Get to the top as fast as I possibly can. 

That following winter I bought my first road bike and started going to spinning classes in anticipation of the coming spring. Once spring hit, I started venturing out on various group rides during the week but eventually hooked up with a small group of people who had work and life schedules that provided more opportunity to ride at 5:30 AM rather than the afternoon. We dubbed ourselves the “Morning Cranks” and over time the group began to grow, and the rides began to become faster. This provided me with a group of friends to ride with consistently, compete on Strava segments with, give me confidence to sign up for my first race and overall really made me enjoy the sport. Every time I got on the bike, I was constantly trying to learn from the other people around me to make myself a better rider and having fun doing it. Eventually, I began to partake in cat 4/5 races with varying level of success but knew overall that this was something I wanted to keep getting better at. It wasn’t until earlier this summer when I began talking to Terry Ritter about taking my racing to the next level. At first, I was a little nervous for a magnitude of reasons but eventually became confident that joining Team Athletic Mentors was something I really wanted to do. 

Since joining the team, everyone that I have met has been extremely helpful in a variety of ways. The thing that I look forward to most is being able to race among teammates and doing whatever I need to do to help us win some races. I have had a couple opportunities to do that in 2019 when racing the Summer Waterford Series, Cherry Roubaix, Uncle Johns Dirty Ride and The Lowell 50 and I can honestly say it has been way more fun and fulfilling than getting on the podium myself. Not only is the actual racing fun but all the conversation that is had leading up to the race and after the race is always something that I look forward to. I am very excited to be a part of this team and can’t wait to see how we perform during the 2020 race season.


Wait… The Iceman is When?!

October 30th, 2019 by JoAnn Cranson

By:  Terry Ritter

In my almost 20 years of coaching I’ve had a few athletes that signed on to just do a short training plan for the Iceman. Many of these athletes were experiencing their first edition of this race, or one of their first few, and so I made sure I covered all the bases. This meant bike prep, maintenance, nutrition, and other points that could help improve their chances of success. For the ’19 season I have two athletes tying on an Iceman number plate for the first time, and I’m pulling out all my old information to help them prepare in hopes they enjoy this unique event. Here’s some of the important stuff if you need to quickly get things together to optimize your chances.

Proper Bike Set-Up

A number of aspects related to modern bicycle set up rely on volumes of air. Most fork designs that are in the mid-level and above price range have an air chamber for the supporting spring. Rear shocks are likely similar. And, of course, all bicycle tires will be relying on ambient gases as their means of pneumonic support. The tuning of these components depends on the pressure of the air inside, which is usually changed by a rider adding or releasing air. However, major temperature changes will change pressure as described by Charlie’s Law (chemistry alert!). A given pressure will lose about 1 psi for every 10 degree loss of temperature. This doesn’t seem like much, but if you inflate your tires to that perfect 24 psi in your hotel room, they could well be at 20 psi or less at the start of the race. Your fork and shock will be less stiff as well. Solve this problem by letting the bike sit out in the elements and then doing your air adjustments just before starting your warm up. Bonus Point: Don’t forget your shock pump!

Get the Nutrition and Hydration Right

For many racers that have been racing Sport or Beginner all season, the Iceman will be the longest event of the year. Even for a number of Expert level MTBers, if conditions are poor, they could be looking at the same situation. This year’s 30 mile course will add time to everyone as well. For most, what is needed hydration and nutrition wise is uncharted territory. My suggestion is to do a good breakfast a little earlier than normal, that has fewer carbohydrates and more fat and protein. This will allow you a steady energy source for longer. From there, 2 bottles should get most racers through 3 hours with the temps we are likely to race in, especially if you sip a different bottle during warm up (grab a fresh one before heading to the start line). Bring the energy packets of choice (gels, bars), and start supplementing around the 90 min mark. If a 3 hour or more event is expected, you should repeat this every 45 mins or so. A few important points are to never try something new the day of the race, drink early, and be sure to bring just a little extra for bars or gels. And, if it is going to be below freezing for most of the race, an insulated bottle could be a wise choice. Bonus Point: If you plan to eat a gel or bar during the race, don’t mix the energy drink as concentrated to prevent GI distress.

Iceman Maintenance

Nothing is more disappointing then to have your training, race strategy, and nutrition nailed for the big day, then have your bike let you down. Though this can happen no matter what, I have seen certain patterns after 20 plus events, many centered around drivetrain issues. The bike is running and shifting well during pleasant weather from a drivetrain that’s been on the bike all season. Then, race day comes and it’s muddy or sandy and wet. The chain and other parts get covered, and the bike starts skipping, shifting poorly, or chain sucking. Your chain could well be stretched and things aren’t mating well as the conditions turned. Or, you changed the chain after it had stretched a bit too far. Regardless, I have found a good way to avoid this is to either keep my chain changed earlier, or to swap out my big ring, chain, and cassette a few weeks before the Iceman (I usually get a year out of stuff), and so it’s fresh in case the conditions are bad, and that gives me a fresh drivetrain before the start of the next season. Another area of concern is getting an appropriate chain lube for conditions (so NOT using the drier, warmer weather wax based stuff you used all summer). People also will not lube their cables, or use a heavier lube/grease that’s fine in warmer weather, but gums up the cable, and so the shifting, when it gets at or below freezing. A thinner lube works well in both applications (I like wet lubes for chains and T-9 for cables this time of year). A few drops on the pedals won’t hurt, either. Don’t forget to put a little fresh sealant in your tires if that’s your set up. It might be a good idea to get your brake pad wear checked. You can burn through 3 months of dry riding in 30 miles of poor conditions. Bonus Point: Make sure you’re clutched derailleur is turned on if you run a 1x system.

Tool Bag

With the Iceman being a point-to-point race, self-support is a bit more important. Even if your result is going to be negatively impacted with a breakdown and you want to give up, it’s often difficult to get to a location that has people. Best to fix what you can and ride it home. Most common tool bag contents would fix most problems. These include a tube, CO2 inflators, tire levers if your tires need them, and a multi-tool. What will end a day poorly is if you can’t manage a broken chain. This is best done with a master link and chain tool in the bag. Bonus Point: Look through your bag to be sure it’s equipped with what you need… and make sure you know how to use everything.

Dress for Success

A common picture from the Iceman is seeing the new riders hopelessly overdressed. This is totally understandable as it might well be chilly before the start, and we all get stuck standing around for a while. But, one must resist the temptation to pile on the outerwear in these situations. You should be a little chilly standing there, as you’ll start heating up once the racing is underway. One trick is to have someone that can take a coat while you are in the staging area. Another good idea is to have the ability to open zippers or remove layered clothing (thinking windproof vest and arm warmers here). Best to have had a chance to test out some of the clothing before you race. This is not always possible, especially with the nice fall we’ve had in Michigan. Regardless, give yourself time to take a few things off after warming up. Don’t forget to look at the forecast. If it’s looking like rain and you’re going to be out there a while, it might be a good idea to pack a jacket. Bonus Point: If you are using chemical warmers, many need some access to air to work.

Scout the Course and Plan Appropriately

This year’s edition had a lot of racers pre-riding the course weeks before. Most of this was likely due to pleasant fall weather we enjoyed. Another fact might well be all the changes incorporated into this season’s route. Regardless, it’s good to know what you’re in for on your way to Traverse City. But the most critical areas are the start and finish. The later can be tackled on the Friday pre-ride, as they will have a small loop set up that riders can do a few times. This is good to get a grasp of where you’ll need to get ahead of riders that you might be racing to the line. For the start, knowing how the course will potentially bottle neck can help determine where a little more effort should be used. New this year is the start from the airport. This will meander around for a significant bit before crossing the paved two lane and heading down a dirt road. This road was in the early editions of the Iceman, and was always a cluster due to large deposits of sand. If you have a chance, be near the front of your class when this area comes up. The later waves will struggle to check it out before the race as there will be waves and waves of riders. But, any knowledge ahead of time could prevent a catastrophe. Bonus Point: You can’t win the race at the start, but you can certainly lose it.

Resting and Race Day Warm Up

There are two major things that can impact a race negatively, but are common mistakes. The first I have seen over the years is people riding too much leading up to the Iceman. They want to get as much riding in, either due to a late start to event training , or just not understanding the power of rest. They will post hard or long riding hours the week preceding, then rest a day or two with little to no training. Unfortunately, anything we physically do to improve conditioning won’t materialize for 7-10 days at the minimum. For this reason, your hard training should end earlier and you should taper into the race. This means reducing your efforts about 30% each of the two weeks leading up to the first weekend in November. However, if you haven’t done that to this point, understand you can’t carry fatigue into the race and perform your best. With less than one week left, get some shorter, intense rides in and rest a lot more. Don’t be completely off the bike, but make sure you have good legs the day we pin the numbers on. Also, I see people afraid to get out in the cold the morning of Iceman, and so they stick around in their vehicles and fall behind, rushing to get a warm up in and get to their wave early enough to position well. When the gun goes off you want to be the best you can be, rested, warmed up, and ready to go. Bonus Point: It’s a common practice to take two days before the race completely off, then do a short ride on Friday that has a few hard, short efforts.

With days before the big race, some of this advice might be too late. But, even if one little parcel of knowledge helps your event go better it will be well worth the read. And, you’ll be all the more prepared for your next Iceman Cometh!


An Exercise in Learning

October 23rd, 2019 by JoAnn Cranson

By:  Ross DiFalco

Bike racing is an incredibly rewarding sport. It can also be very frustrating. This is the synopsis of my first season of trying to figure out this whole bike-racing thing.

To start things off, mentorship is the greatest thing you can hope for. Find some great people that have been in the sport and take their advice!  There are plenty of times when I feel I know best and the result is rarely in my favor. Beyond finding a mentor , what you can do is to learn to manage time. Bike racing is a time intensive sport. If you can’t find time to ride, winning is not in the cards. I am going to tell you the tips I use to make training happen while life tries to get in the way.

Structure

Structure is the name of the game for anyone who has a life outside of cycling. The problem is that I have always been someone that hates the idea of structure. To me, structure is what sucks the fun out of the sport. The problem with this mentality is that when life gets busy, you cannot be sloppy with your time. It’s taken the entire season of struggling along to realize that structure may actually bring sanity. Unless you have zero responsibilities, riding 10 hours a week can be difficult to fit into a 50-hour work week. Many people, myself included, can either maintain their cycling or their personal life, not both. A tip given to me is that you should create a training plan that lists all the rides and races you will be doing in advance. The idea is that you can then plan around these events and set expectations with family and friends so they know when you are committed to something. Creating balance that allows an efficient use of time will be my biggest goal for the upcoming season.

Prepare For The Worst

Things WILL happen. Everyone thinks they’re invincible until something happens. For me, it was a pretty nasty crash. The crash resulted in lots of road rash and a torn tendon in my finger. Now most sane people would go to the doctor when their finger stops working. When you’re delusional about training, the strategy is to avoid the doctor out of fear they will tell you not to ride. THIS IS A MISTAKE. By the time I caved and went to the doctor, the tendon had shrunk and I had done more damage. The worst part is that now I have to limit gripping things for 8 more weeks. Now I don’t know about you, but when I ride bikes I prefer to hold on. If I was realistic about the injury from the start things might have been different.

The Trainer

I hate riding the trainer. Riding indoors is something that I’m just going to have to come to terms with. The trainer is so efficient with time! Using training software, such as Zwift, allows you to get on a scheduled plan that will continually push our limits. When you are riding on a trainer there is no coasting, this makes for a much more condensed session. The second reason you should incorporate a trainer is that, like I said above, things happen. When you can’t ride a bike you may be able to ride indoors. The third reason that a trainer is a great tool is that it’s safer than riding in the dark. Autumn in Michigan means shorter days and a decision to either get lights or ride inside. Riding at night, while fun, comes with some added risk. On a trainer, it’s very easy to get up in the morning, get a quick ride in and go along with your day. It’s a low risk and easy thing to incorporate. If you are new to indoor cycling, I recommend getting a direct drive unit, like the Wahoo Kickr. I went cheap and bought the Wahoo Snap and it works but isn’t very consistent for training. I would also recommend Zwift or TrainerRoad as the training software.

If you can do one thing for yourself, it’s to find a mentor and listen to them! Beyond that, get better at managing the time you have and remember to have fun once in awhile!


SPONSORSView All


Team Athletic Mentors
© 2024 - Team Athletic Mentors